> ## Documentation Index
> Fetch the complete documentation index at: https://docs.gorbit.cloud/llms.txt
> Use this file to discover all available pages before exploring further.
# EKS
> Deploy Gorbit on AWS EKS
EKS has recently updated their cluster and node group creation process. The contents of this guide are still relevant,
but the flow has changed slightly.
Updates to this guide are coming soon!
## Guide
EKS requires the AWS CLI and kubectl CLI.
* Download and install the [AWS CLI](https://aws.amazon.com/cli/)
* Download and install [kubectl CLI](https://kubernetes.io/docs/tasks/tools/install-kubectl-macos/)
For this guide, we will use standard settings with the EBS CSI driver.
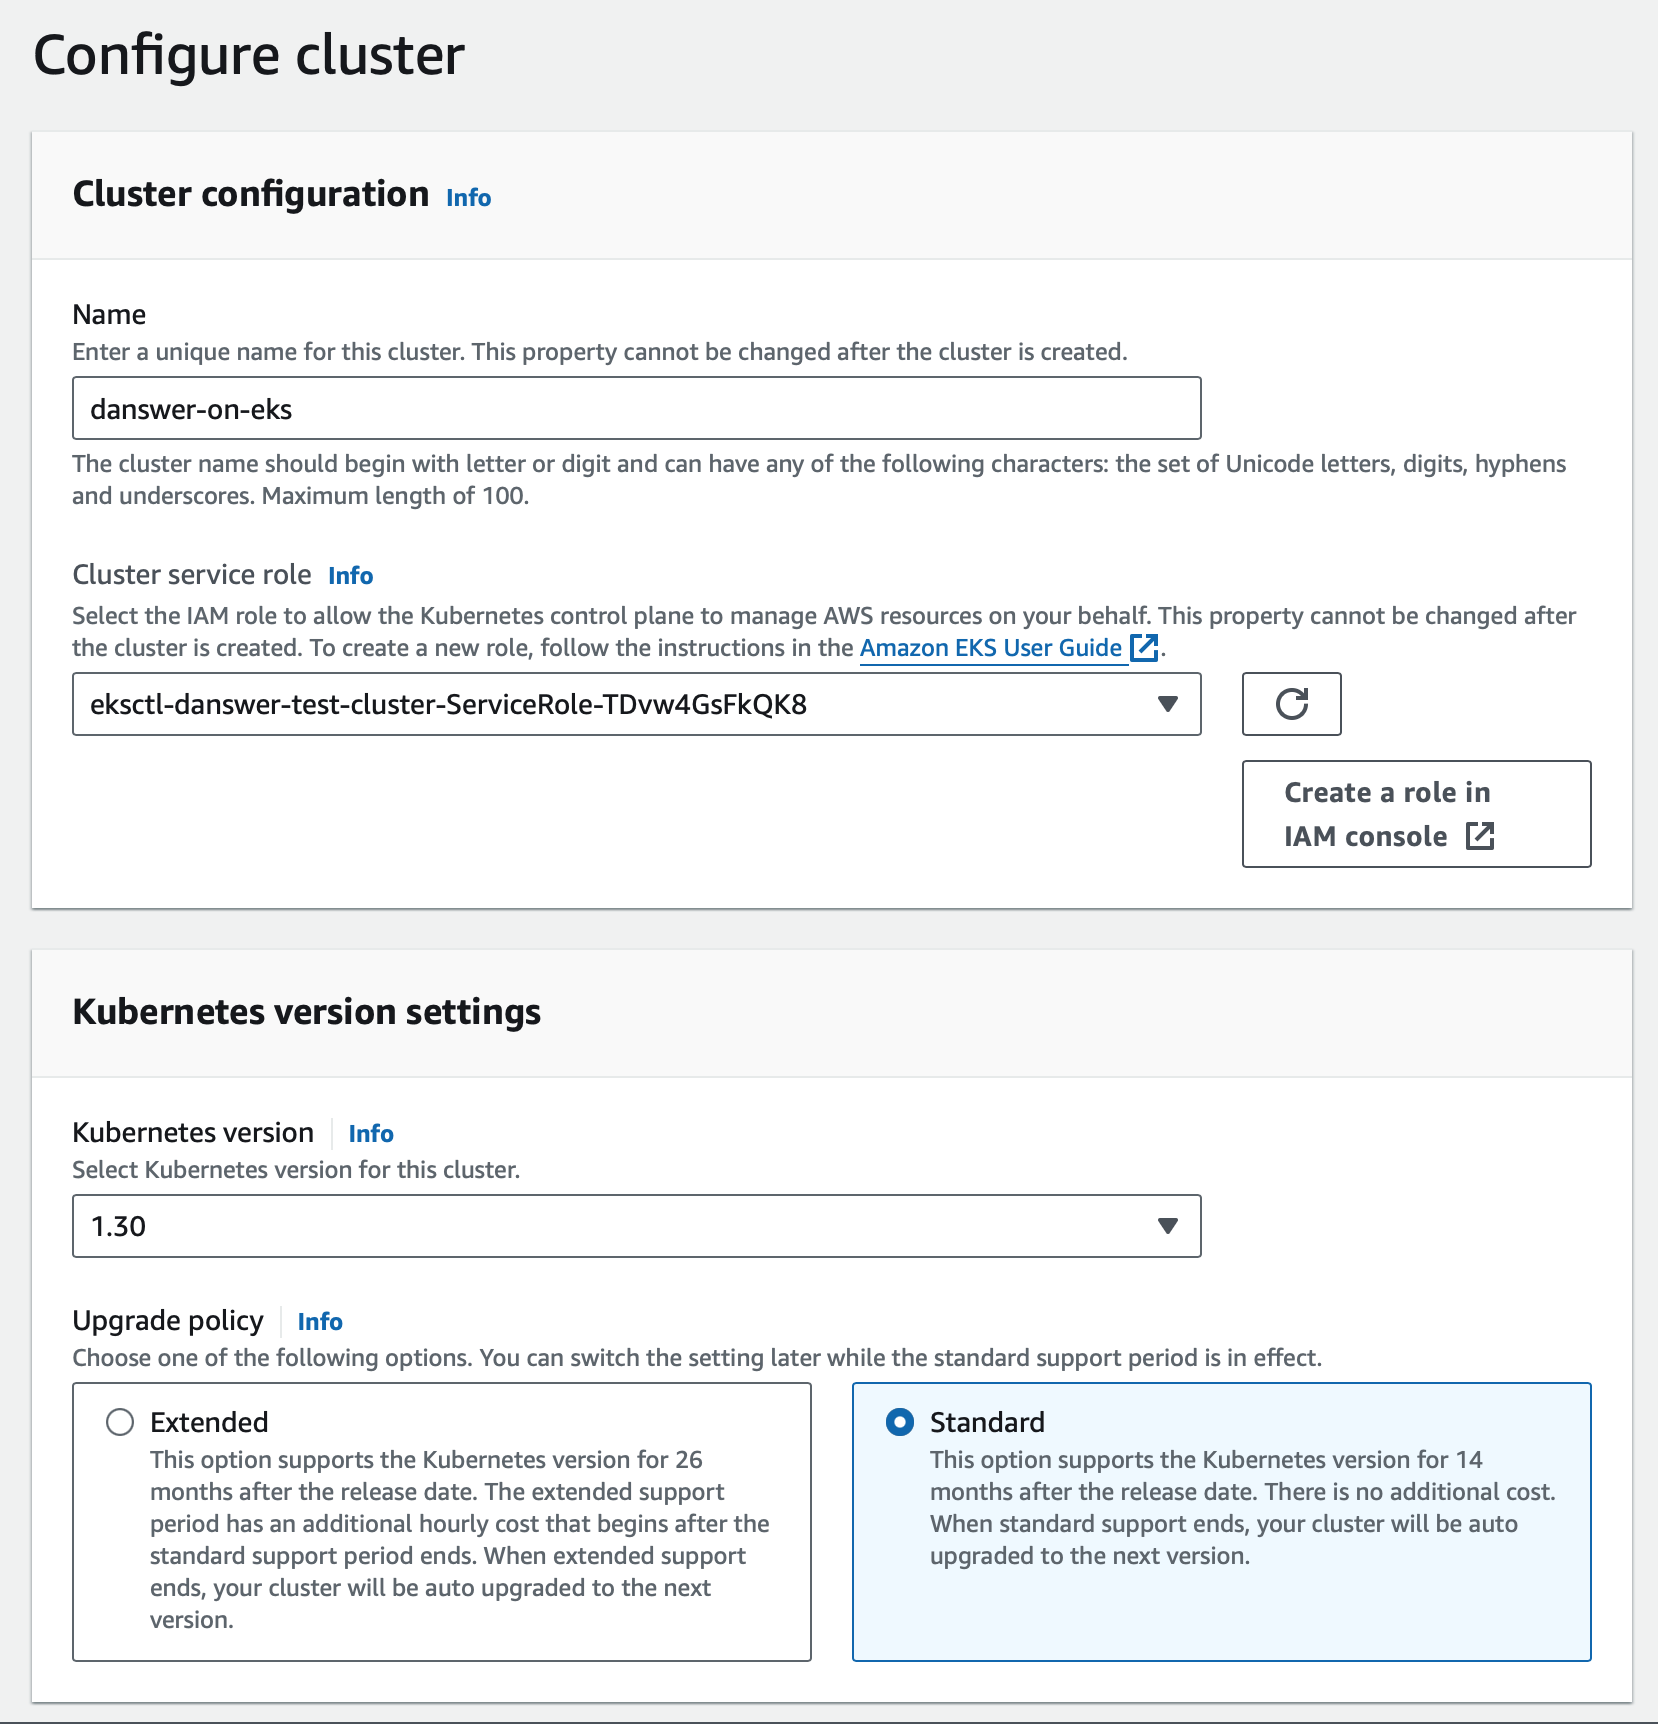
* Navigate to Elastic Kubernetes Service (EKS) and create a new cluster
* For **Cluster service role**, create a new IAM role with a descriptive name like `gorbit-eks-cluster-role`
If you do not see the newly created role in the dropdown, click the refresh button in the UI.
* For **Kubernetes version**, select a version with standard support
* Choose **Standard** upgrade policy
* Add the **Amazon EBS CSI Driver** add-on for Gorbit's `Persistent Volume Claims`
* Keep the other default add-ons enabled
* Review and click **Create**
The cluster may take several minutes to become ready
 Once the cluster is active, add worker nodes where Gorbit services will run.
* On the **Cluster** page, select the **Compute** tab and click **Add node group**
* Provide a **Name** for the group (e.g., `gorbit-node-group`)
* For **Node IAM role**, either select an existing role used by your organization or create
a new one.
Ensure the role has the `AmazonEBSCSIDriverPolicy` attached so that PVCs can be fulfilled. If creating a role,
add this policy in addition to the default policies.
* Replace the **Instance types** with `c5.2xlarge` machines (or `c5.4xlarge` if you plan to scale beyond 100k documents)
* Set **Volume size** in the 200GB - 800GB range depending on your document count
See the [Resourcing Guide](/deployment/getting_started/resourcing) for more details on storage requirements.
* For most setups, set the **Desired size** and **Minimum size** to 1. You can increase
these later to scale up.
* **Maximum unavailable** can remain at the default
* Keep the default networking configuration and click **Create**
It may take up to 15 minutes for the compute nodes to come online.
We will need an IAM user with CLI access to manage AWS and the cluster.
* Navigate to the [IAM Dashboard](https://console.aws.amazon.com/iam/), select **Users** in the left sidebar, and click **Create user**
* Give the user a descriptive name (e.g., `gorbit-eks-user`)
* Under permissions, click **Attach policies directly** and attach:
* `AmazonEKSClusterPolicy`
* `AmazonEKSServicePolicy`
* Click **Create user**
* On the user's page, click **Create access key** and follow the prompts.
* Select the **Command Line Interface (CLI)** option during creation.
Save the **Access key** and **Secret access key** for later!
* Navigate back to the EKS cluster and select **Access** and then **Create access entry**
* In **IAM principal**, select the IAM ARN we just created, then click **Next**
* For Access policies, set **Policy name** to `AmazonEKSClusterAdminPolicy`, then click **Next** and **Create**
Log in to the AWS CLI and provide the access key and secret key from the IAM user we just created:
```bash theme={null}
aws configure
```
Configure your kubeconfig to connect to the cluster by filling in the `region-code` and `cluster-name`:
```bash theme={null}
aws eks update-kubeconfig --region region-code --name cluster-name
```
Reference [AWS EKS kubeconfig docs](https://docs.aws.amazon.com/eks/latest/userguide/create-kubeconfig.html).
The Gorbit Helm chart packages all the required services (API, web, PostgreSQL, Vespa, etc.) into a single deployment.
By default, persistent volumes will be created for stateful services.
First, ensure the `gp2` storage class is set as the default storage class (required for PVCs):
```bash theme={null}
kubectl patch storageclass gp2 -p '{"metadata": {"annotations":{"storageclass.kubernetes.io/is-default-class":"true"}}}'
```
Add the Gorbit Helm repository:
```bash theme={null}
helm repo add gorbit https://gorbit-dot-app.github.io/gorbit/
helm repo update
helm search repo gorbit
```
Create a dedicated namespace and install Gorbit:
```bash theme={null}
kubectl create namespace gorbit
helm install gorbit gorbit/gorbit -n gorbit
```
This will pull the latest Gorbit chart and deploy all dependencies.
```bash theme={null}
helm list -n gorbit
kubectl get pods -n gorbit
```
Wait until all pods are in a `Running` state before accessing Gorbit.
To check the API server logs (often the last to become ready):
```bash theme={null}
kubectl -n gorbit get pods | grep api-server | awk '{print $1}' | xargs -I {} kubectl -n gorbit logs {} -f
```
For local testing, port-forward:
```bash theme={null}
kubectl -n gorbit port-forward service/gorbit-nginx 8080:80
```
Then open [http://localhost:8080](http://localhost:8080).
## Upgrading
To upgrade Gorbit services, first update the Helm repository:
```bash theme={null}
helm repo update
helm upgrade gorbit gorbit/gorbit -n gorbit
```
To upgrade to a specific version, use:
```bash theme={null}
helm upgrade gorbit gorbit/gorbit -n gorbit --version
```
## Uninstalling
To remove the Gorbit services:
```bash theme={null}
helm uninstall gorbit -n gorbit
```
Vespa, Postgres, and MinIO leave behind PVCs. To delete them:
```bash theme={null}
kubectl -n gorbit get pvc
kubectl -n gorbit delete pvc vespa-storage-da-vespa-0
kubectl -n gorbit delete pvc gorbit-minio
kubectl -n gorbit delete pvc data-gorbit-postgresql-0
```
## Next Steps
Set up authentication for your Gorbit deployment with OAuth, OIDC, or SAML.
Learn about all available configuration options for your Gorbit deployment.
Once the cluster is active, add worker nodes where Gorbit services will run.
* On the **Cluster** page, select the **Compute** tab and click **Add node group**
* Provide a **Name** for the group (e.g., `gorbit-node-group`)
* For **Node IAM role**, either select an existing role used by your organization or create
a new one.
Ensure the role has the `AmazonEBSCSIDriverPolicy` attached so that PVCs can be fulfilled. If creating a role,
add this policy in addition to the default policies.
* Replace the **Instance types** with `c5.2xlarge` machines (or `c5.4xlarge` if you plan to scale beyond 100k documents)
* Set **Volume size** in the 200GB - 800GB range depending on your document count
See the [Resourcing Guide](/deployment/getting_started/resourcing) for more details on storage requirements.
* For most setups, set the **Desired size** and **Minimum size** to 1. You can increase
these later to scale up.
* **Maximum unavailable** can remain at the default
* Keep the default networking configuration and click **Create**
It may take up to 15 minutes for the compute nodes to come online.
We will need an IAM user with CLI access to manage AWS and the cluster.
* Navigate to the [IAM Dashboard](https://console.aws.amazon.com/iam/), select **Users** in the left sidebar, and click **Create user**
* Give the user a descriptive name (e.g., `gorbit-eks-user`)
* Under permissions, click **Attach policies directly** and attach:
* `AmazonEKSClusterPolicy`
* `AmazonEKSServicePolicy`
* Click **Create user**
* On the user's page, click **Create access key** and follow the prompts.
* Select the **Command Line Interface (CLI)** option during creation.
Save the **Access key** and **Secret access key** for later!
* Navigate back to the EKS cluster and select **Access** and then **Create access entry**
* In **IAM principal**, select the IAM ARN we just created, then click **Next**
* For Access policies, set **Policy name** to `AmazonEKSClusterAdminPolicy`, then click **Next** and **Create**
Log in to the AWS CLI and provide the access key and secret key from the IAM user we just created:
```bash theme={null}
aws configure
```
Configure your kubeconfig to connect to the cluster by filling in the `region-code` and `cluster-name`:
```bash theme={null}
aws eks update-kubeconfig --region region-code --name cluster-name
```
Reference [AWS EKS kubeconfig docs](https://docs.aws.amazon.com/eks/latest/userguide/create-kubeconfig.html).
The Gorbit Helm chart packages all the required services (API, web, PostgreSQL, Vespa, etc.) into a single deployment.
By default, persistent volumes will be created for stateful services.
First, ensure the `gp2` storage class is set as the default storage class (required for PVCs):
```bash theme={null}
kubectl patch storageclass gp2 -p '{"metadata": {"annotations":{"storageclass.kubernetes.io/is-default-class":"true"}}}'
```
Add the Gorbit Helm repository:
```bash theme={null}
helm repo add gorbit https://gorbit-dot-app.github.io/gorbit/
helm repo update
helm search repo gorbit
```
Create a dedicated namespace and install Gorbit:
```bash theme={null}
kubectl create namespace gorbit
helm install gorbit gorbit/gorbit -n gorbit
```
This will pull the latest Gorbit chart and deploy all dependencies.
```bash theme={null}
helm list -n gorbit
kubectl get pods -n gorbit
```
Wait until all pods are in a `Running` state before accessing Gorbit.
To check the API server logs (often the last to become ready):
```bash theme={null}
kubectl -n gorbit get pods | grep api-server | awk '{print $1}' | xargs -I {} kubectl -n gorbit logs {} -f
```
For local testing, port-forward:
```bash theme={null}
kubectl -n gorbit port-forward service/gorbit-nginx 8080:80
```
Then open [http://localhost:8080](http://localhost:8080).
## Upgrading
To upgrade Gorbit services, first update the Helm repository:
```bash theme={null}
helm repo update
helm upgrade gorbit gorbit/gorbit -n gorbit
```
To upgrade to a specific version, use:
```bash theme={null}
helm upgrade gorbit gorbit/gorbit -n gorbit --version
```
## Uninstalling
To remove the Gorbit services:
```bash theme={null}
helm uninstall gorbit -n gorbit
```
Vespa, Postgres, and MinIO leave behind PVCs. To delete them:
```bash theme={null}
kubectl -n gorbit get pvc
kubectl -n gorbit delete pvc vespa-storage-da-vespa-0
kubectl -n gorbit delete pvc gorbit-minio
kubectl -n gorbit delete pvc data-gorbit-postgresql-0
```
## Next Steps
Set up authentication for your Gorbit deployment with OAuth, OIDC, or SAML.
Learn about all available configuration options for your Gorbit deployment.