> ## Documentation Index
> Fetch the complete documentation index at: https://docs.gorbit.cloud/llms.txt
> Use this file to discover all available pages before exploring further.
# EC2
> Deploy Gorbit on AWS EC2
Using AWS EC2 is the recommended way of deploying Gorbit.
It is simple to set up and should meet the performance needs of 90% of organizations looking to use Gorbit!
## Guide
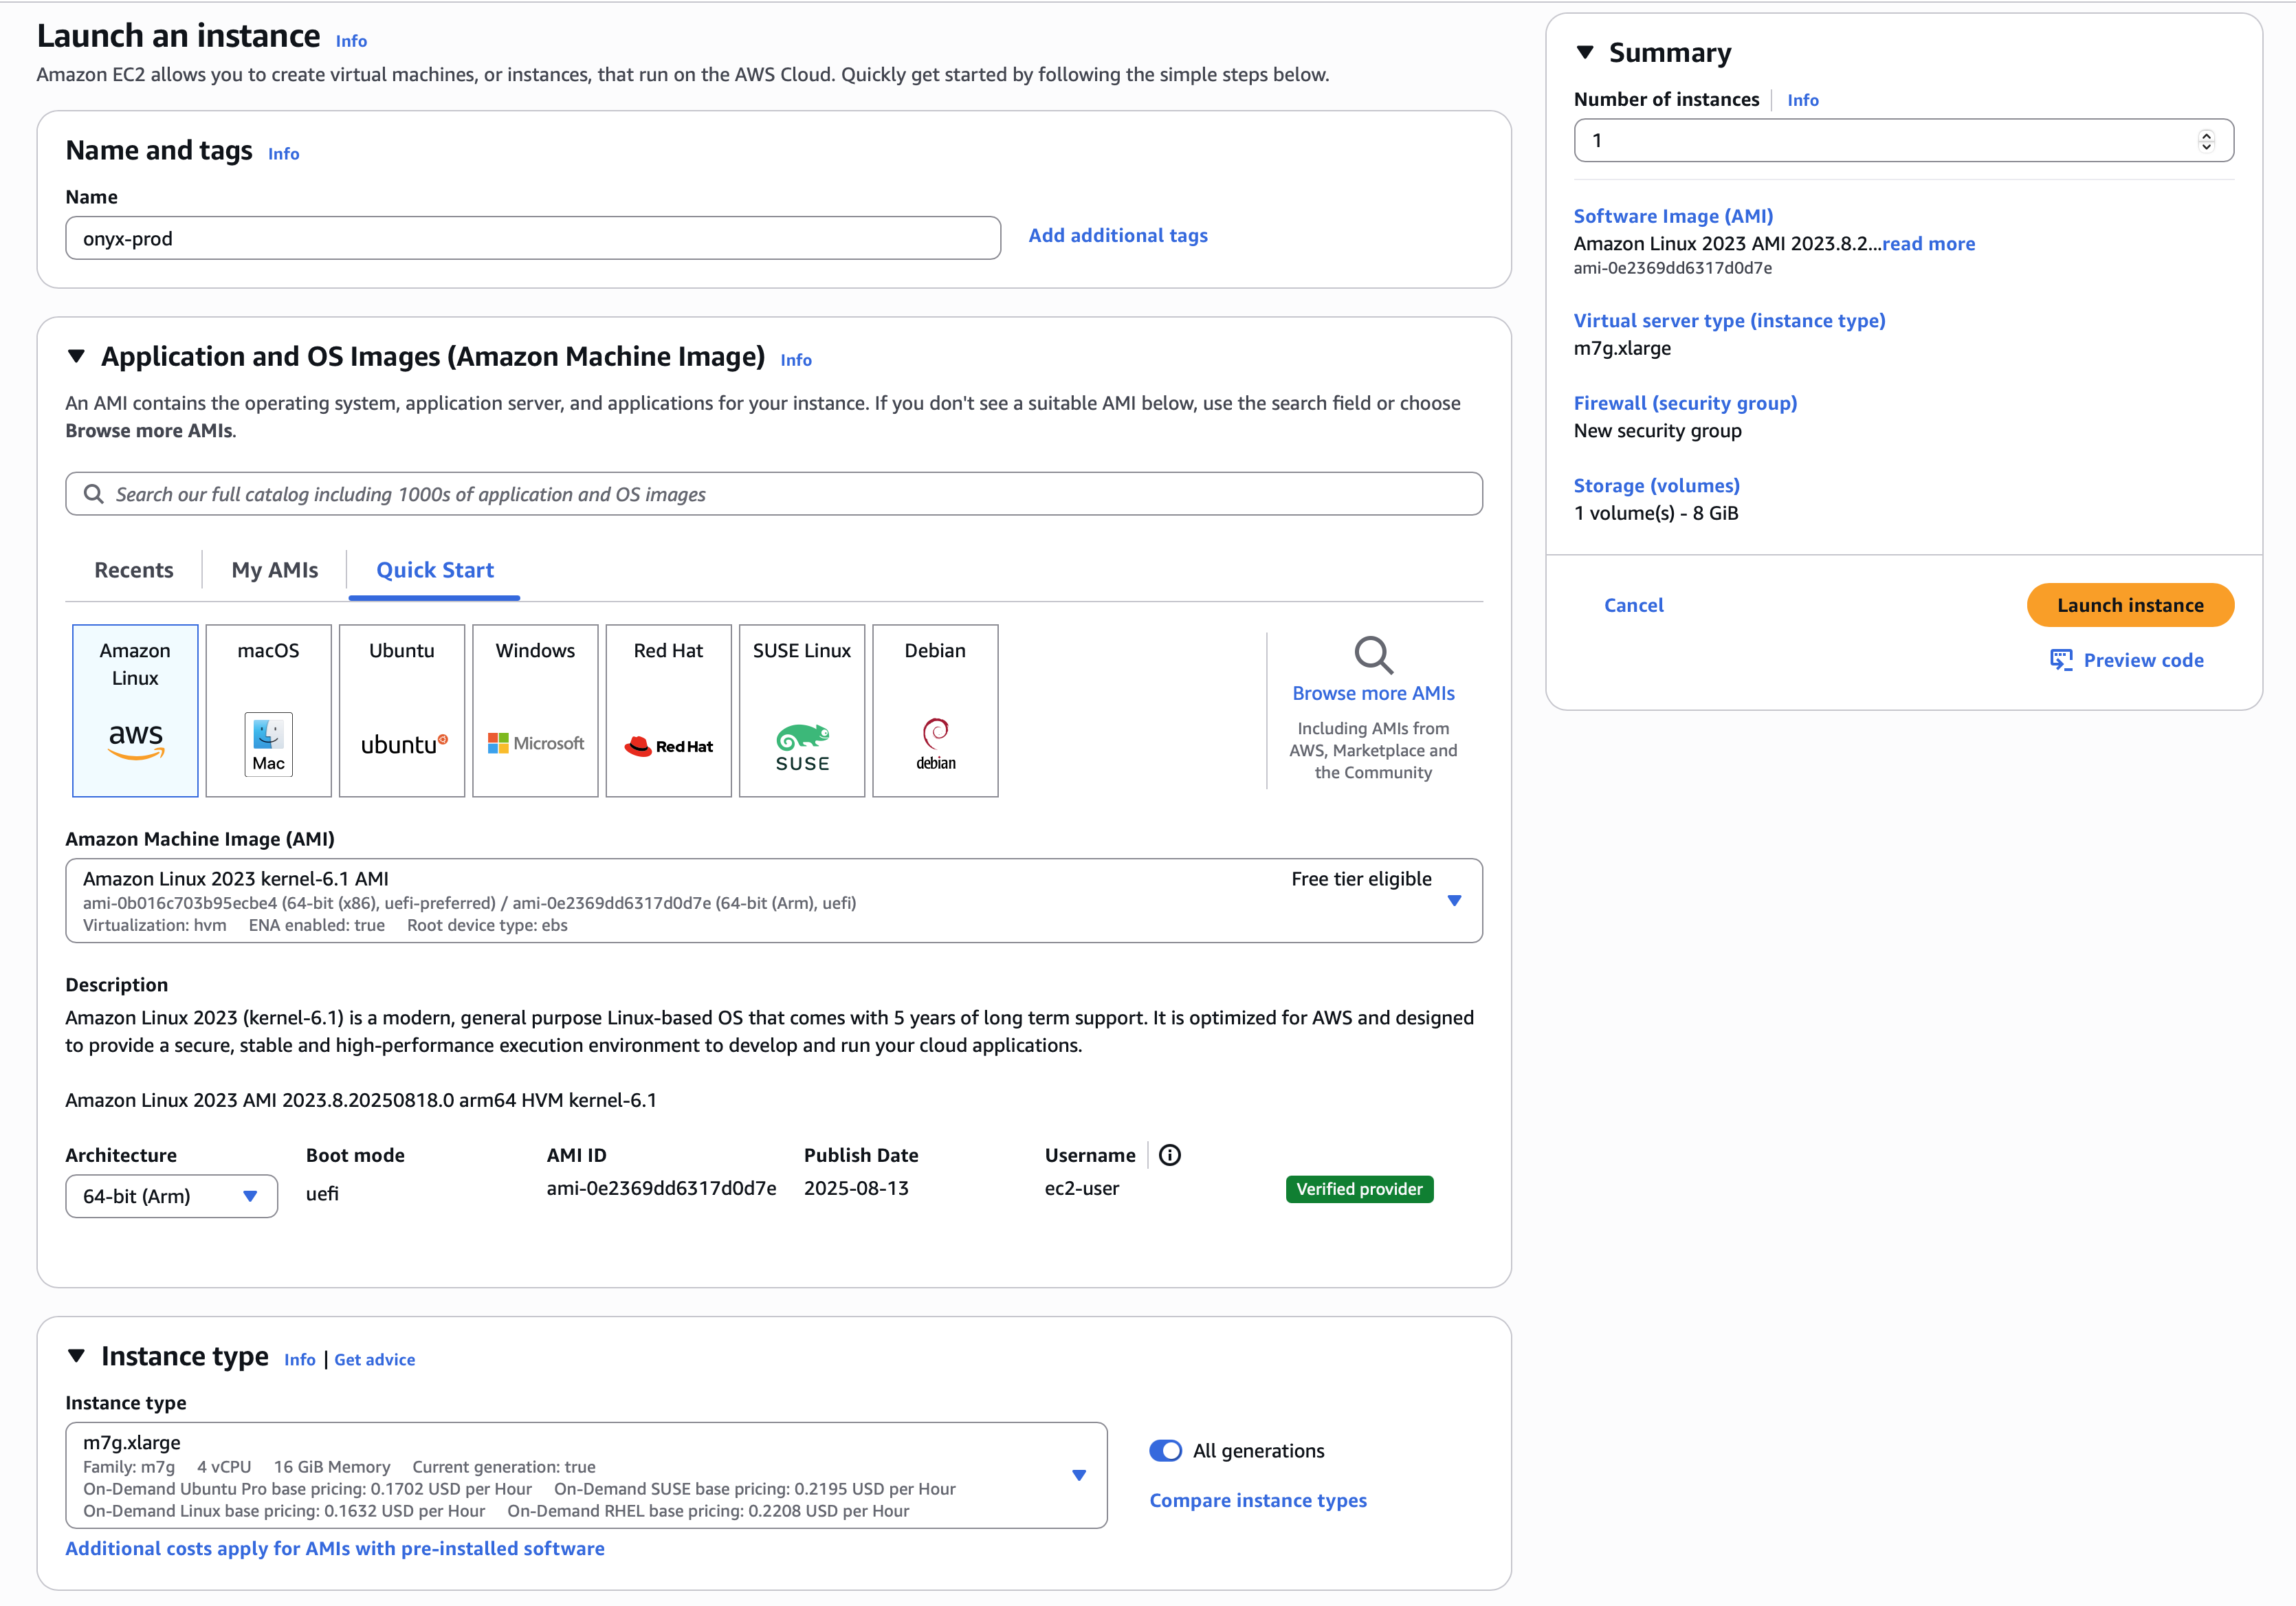
Create an EC2 instance with the appropriate resources. For this guide,
we will use the recommended `m7g.xlarge` instance.
Read our [Resourcing guide](/deployment/getting_started/resourcing) for more details.
* Give your instance a descriptive name like `gorbit-prod`
* Select the `Amazon Linux 2023` AMI
* Select the `64-bit (Arm)` architecture
* Select the `m7g.xlarge` instance type
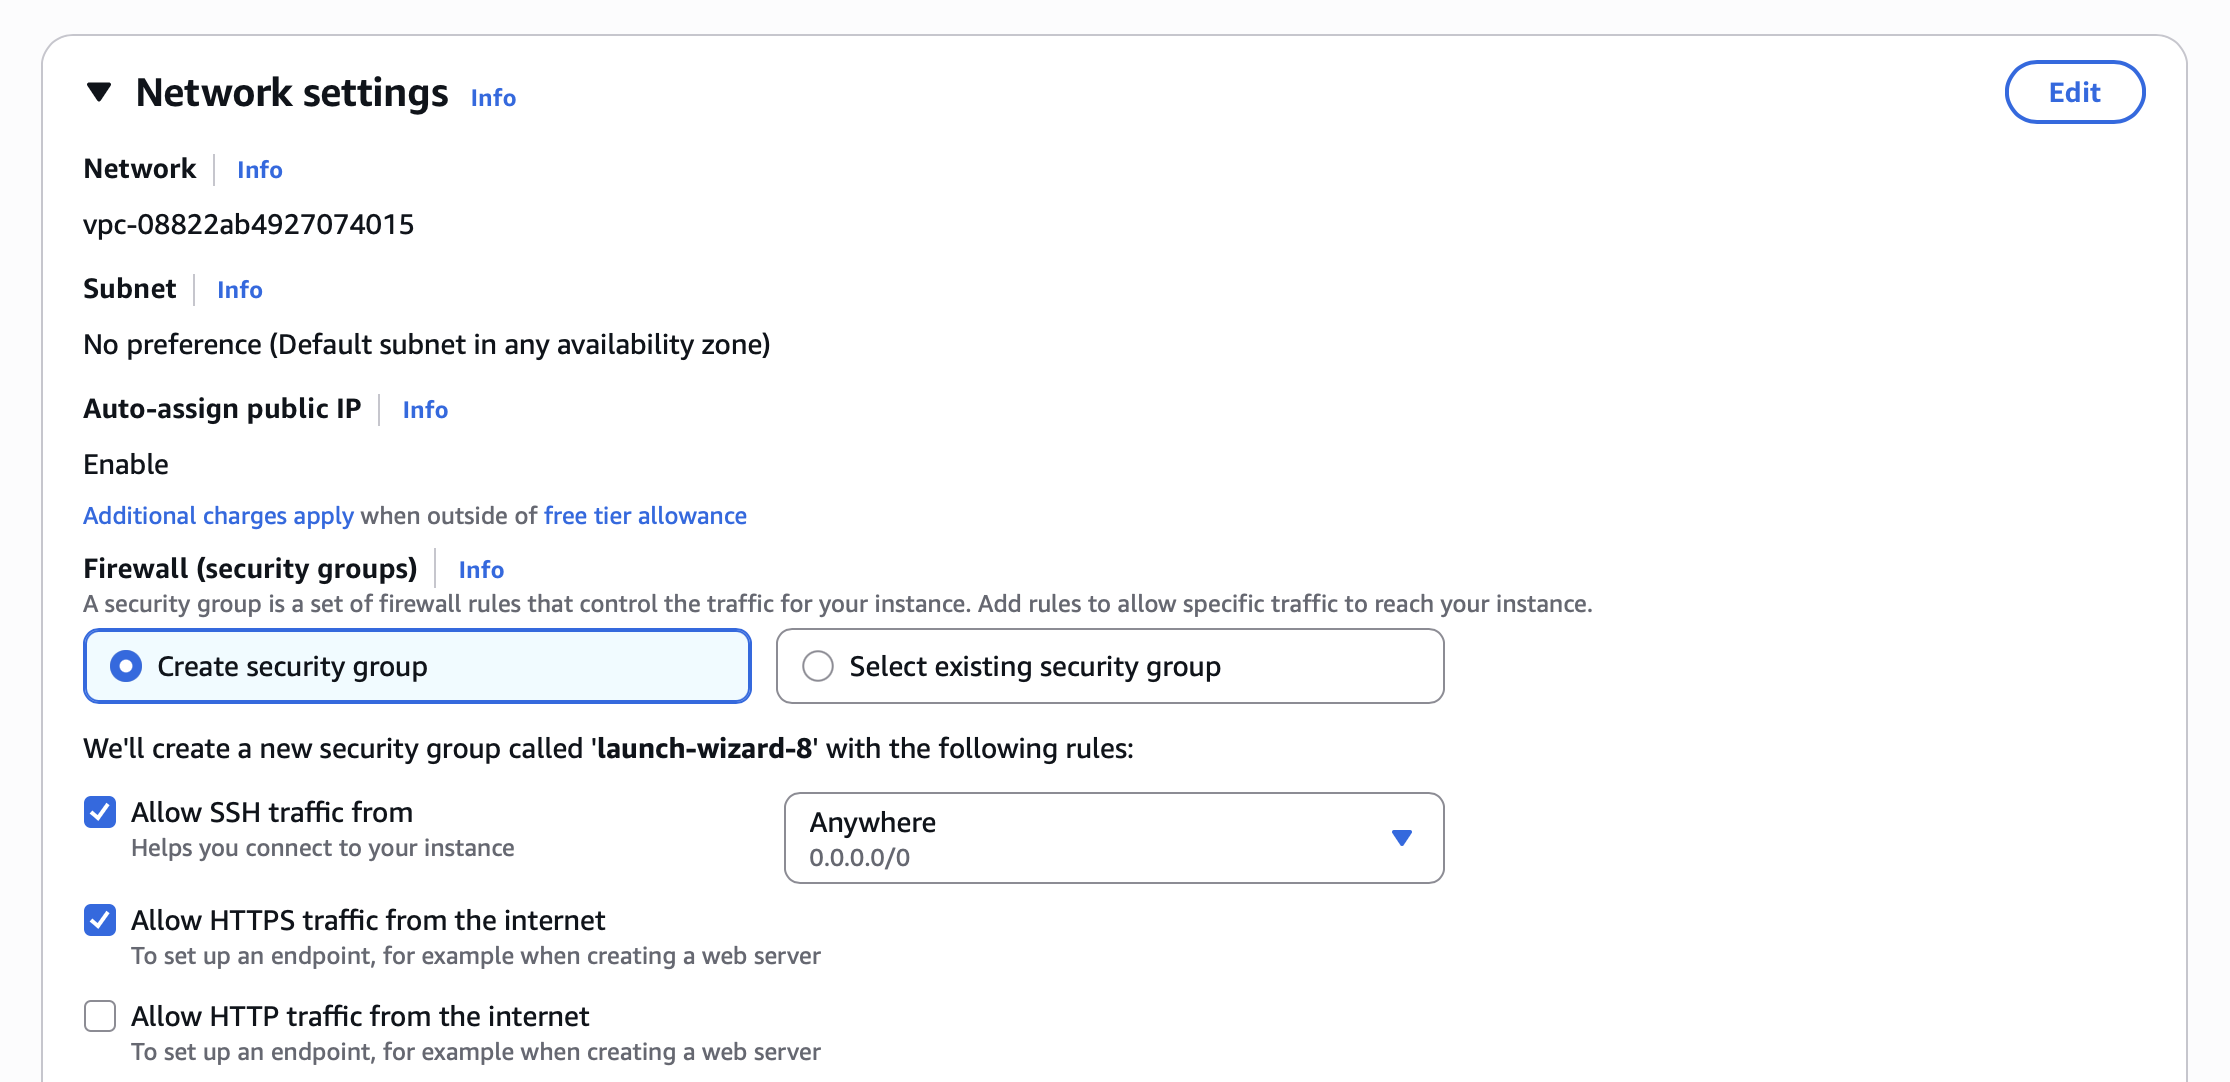
* Select `Allow HTTPS traffic from the internet` in the *Network settings* section
* Configure storage following the Resourcing Guide
 Click **Launch instance** and then view your instance details.
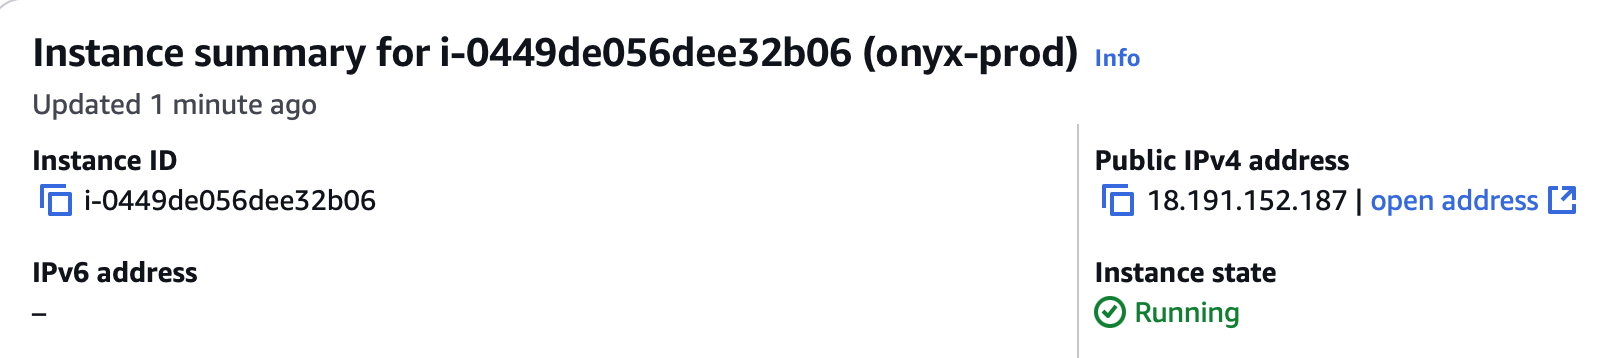
Save the **Public IPv4 address** of the instance!
Click **Launch instance** and then view your instance details.
Save the **Public IPv4 address** of the instance!
 If you don't have a domain, buy one from a DNS provider like [GoDaddy](https://www.godaddy.com/)
or just skip HTTPS for now.
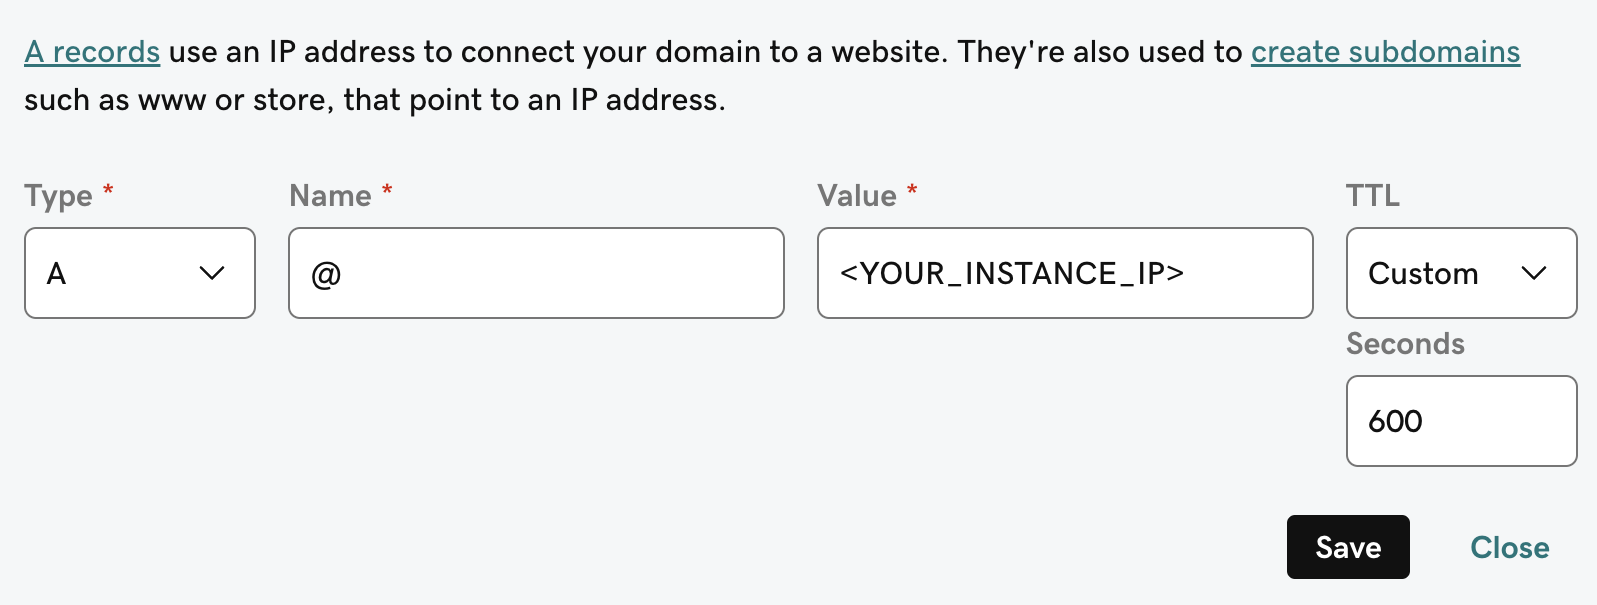
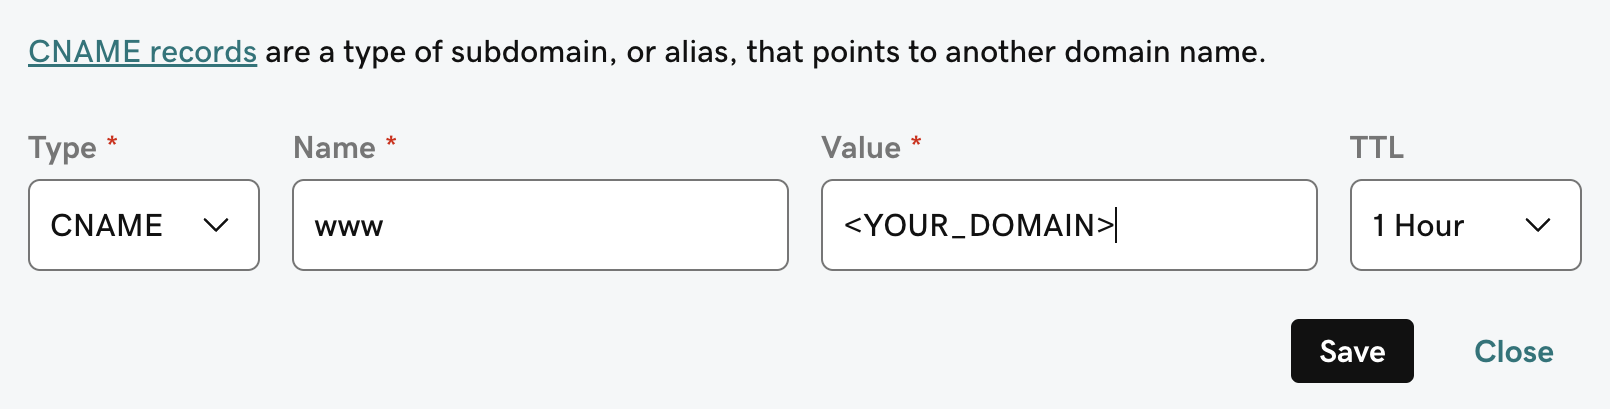
To point our domain to the new instance, we need to add an `A` and `CNAME` record to our DNS provider.
The `A` record should be the subdomain that you would like to use for the Gorbit instance like `prod`.
The `CNAME` record should be the same name with the `www.` in front resulting in `www.prod` pointing to the full
domain like `prod.gorbit.app`.
If you don't have a domain, buy one from a DNS provider like [GoDaddy](https://www.godaddy.com/)
or just skip HTTPS for now.
To point our domain to the new instance, we need to add an `A` and `CNAME` record to our DNS provider.
The `A` record should be the subdomain that you would like to use for the Gorbit instance like `prod`.
The `CNAME` record should be the same name with the `www.` in front resulting in `www.prod` pointing to the full
domain like `prod.gorbit.app`.
 Gorbit requires `git`, `docker`, and `docker compose`.
To install these on Amazon Linux 2023, run the following:
```bash theme={null}
sudo yum update -y
sudo yum install docker -y
sudo service docker start
sudo curl -L https://github.com/docker/compose/releases/latest/download/docker-compose-$(uname -s)-$(uname -m) -o /usr/local/bin/docker-compose
sudo chmod +x /usr/local/bin/docker-compose
sudo yum install git
```
## Next Steps
Set up authentication for your Gorbit deployment with OAuth, OIDC, or SAML.
Learn about all available configuration options for your Gorbit deployment.
Gorbit requires `git`, `docker`, and `docker compose`.
To install these on Amazon Linux 2023, run the following:
```bash theme={null}
sudo yum update -y
sudo yum install docker -y
sudo service docker start
sudo curl -L https://github.com/docker/compose/releases/latest/download/docker-compose-$(uname -s)-$(uname -m) -o /usr/local/bin/docker-compose
sudo chmod +x /usr/local/bin/docker-compose
sudo yum install git
```
## Next Steps
Set up authentication for your Gorbit deployment with OAuth, OIDC, or SAML.
Learn about all available configuration options for your Gorbit deployment.