> ## Documentation Index
> Fetch the complete documentation index at: https://docs.gorbit.cloud/llms.txt
> Use this file to discover all available pages before exploring further.
# Google AI
> تكوين نماذج Google Vertex AI للاستخدام مع Gorbit
## الدليل
يرشدك هذا الدليل خلال إعداد Google Vertex AI للاستخدام مع Gorbit.
يقدم Google Vertex AI و Google AI Studio نفس النماذج. ومع ذلك،
يحتوي Vertex AI على ميزات على مستوى المؤسسات قد تكون مفيدة لمؤسستك.
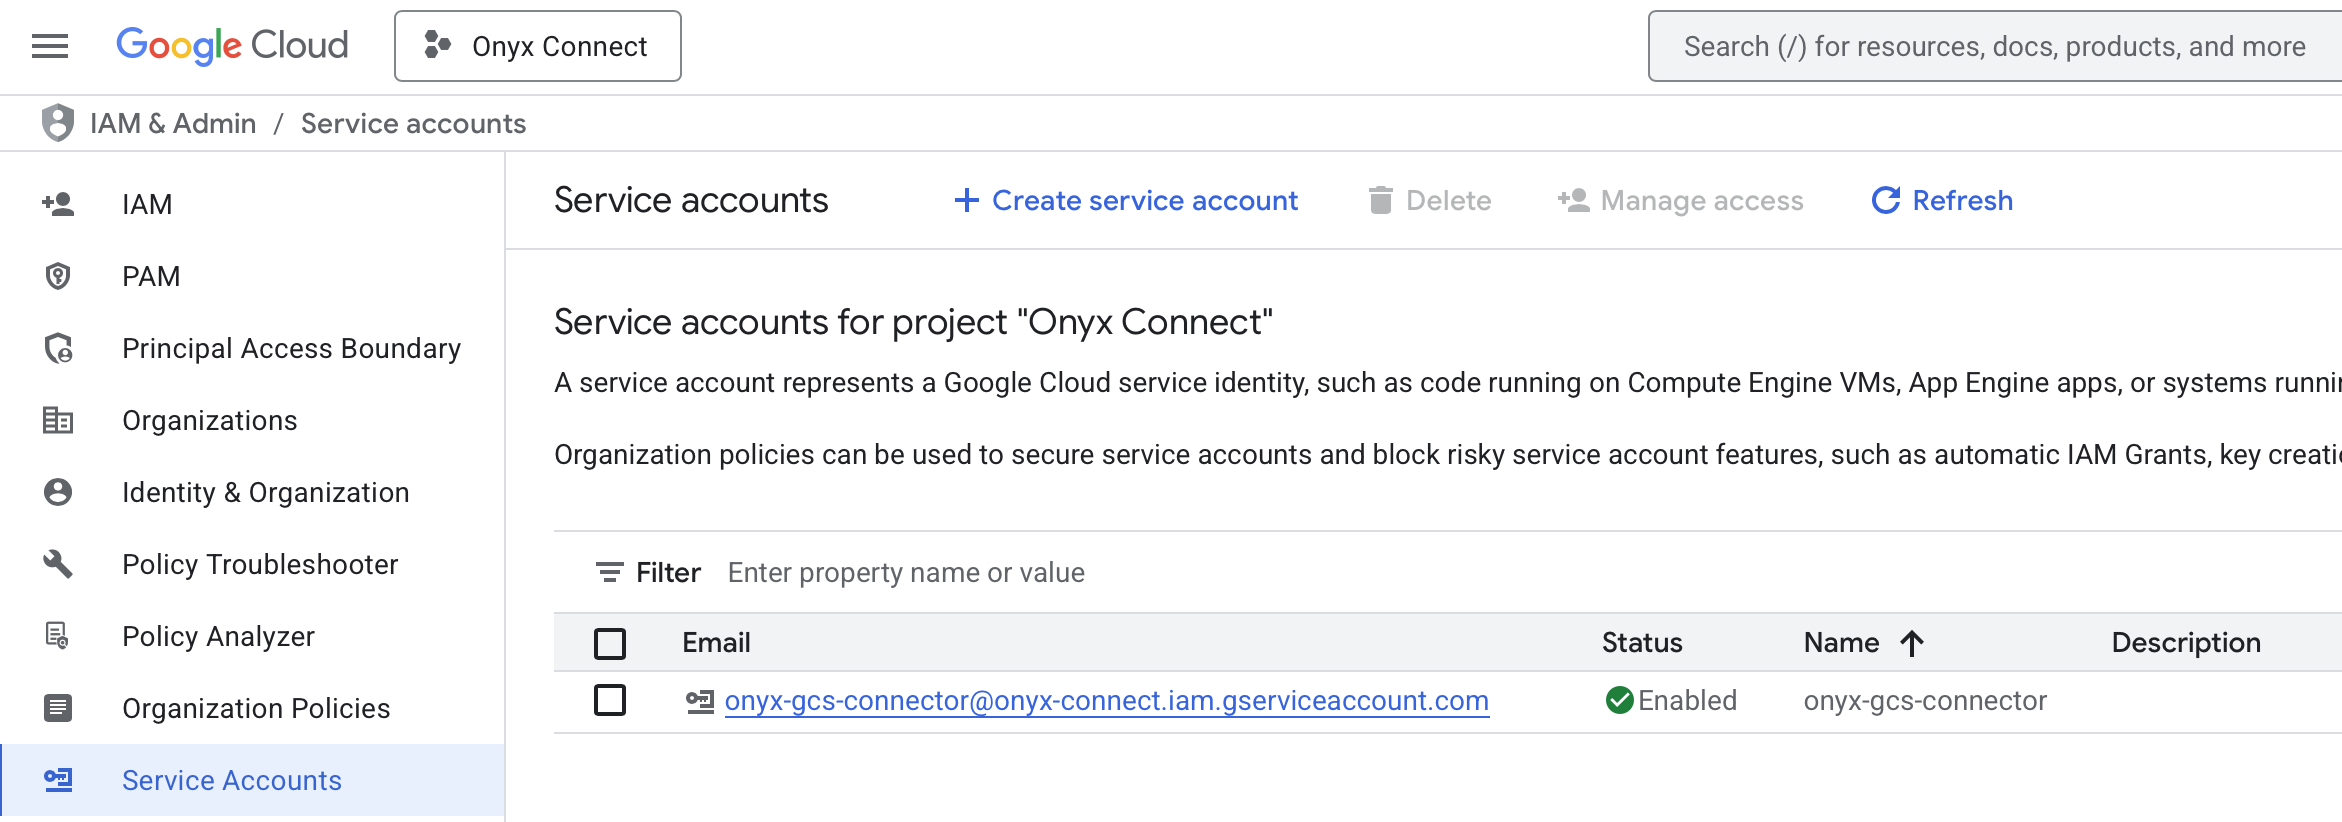
انتقل إلى [صفحة حسابات خدمة Google Cloud Console](https://console.cloud.google.com/iam-admin/serviceaccounts)
اختر مشروعك وانقر على **إنشاء حساب خدمة**.
أعطِ حساب الخدمة اسمًا ووصفًا.
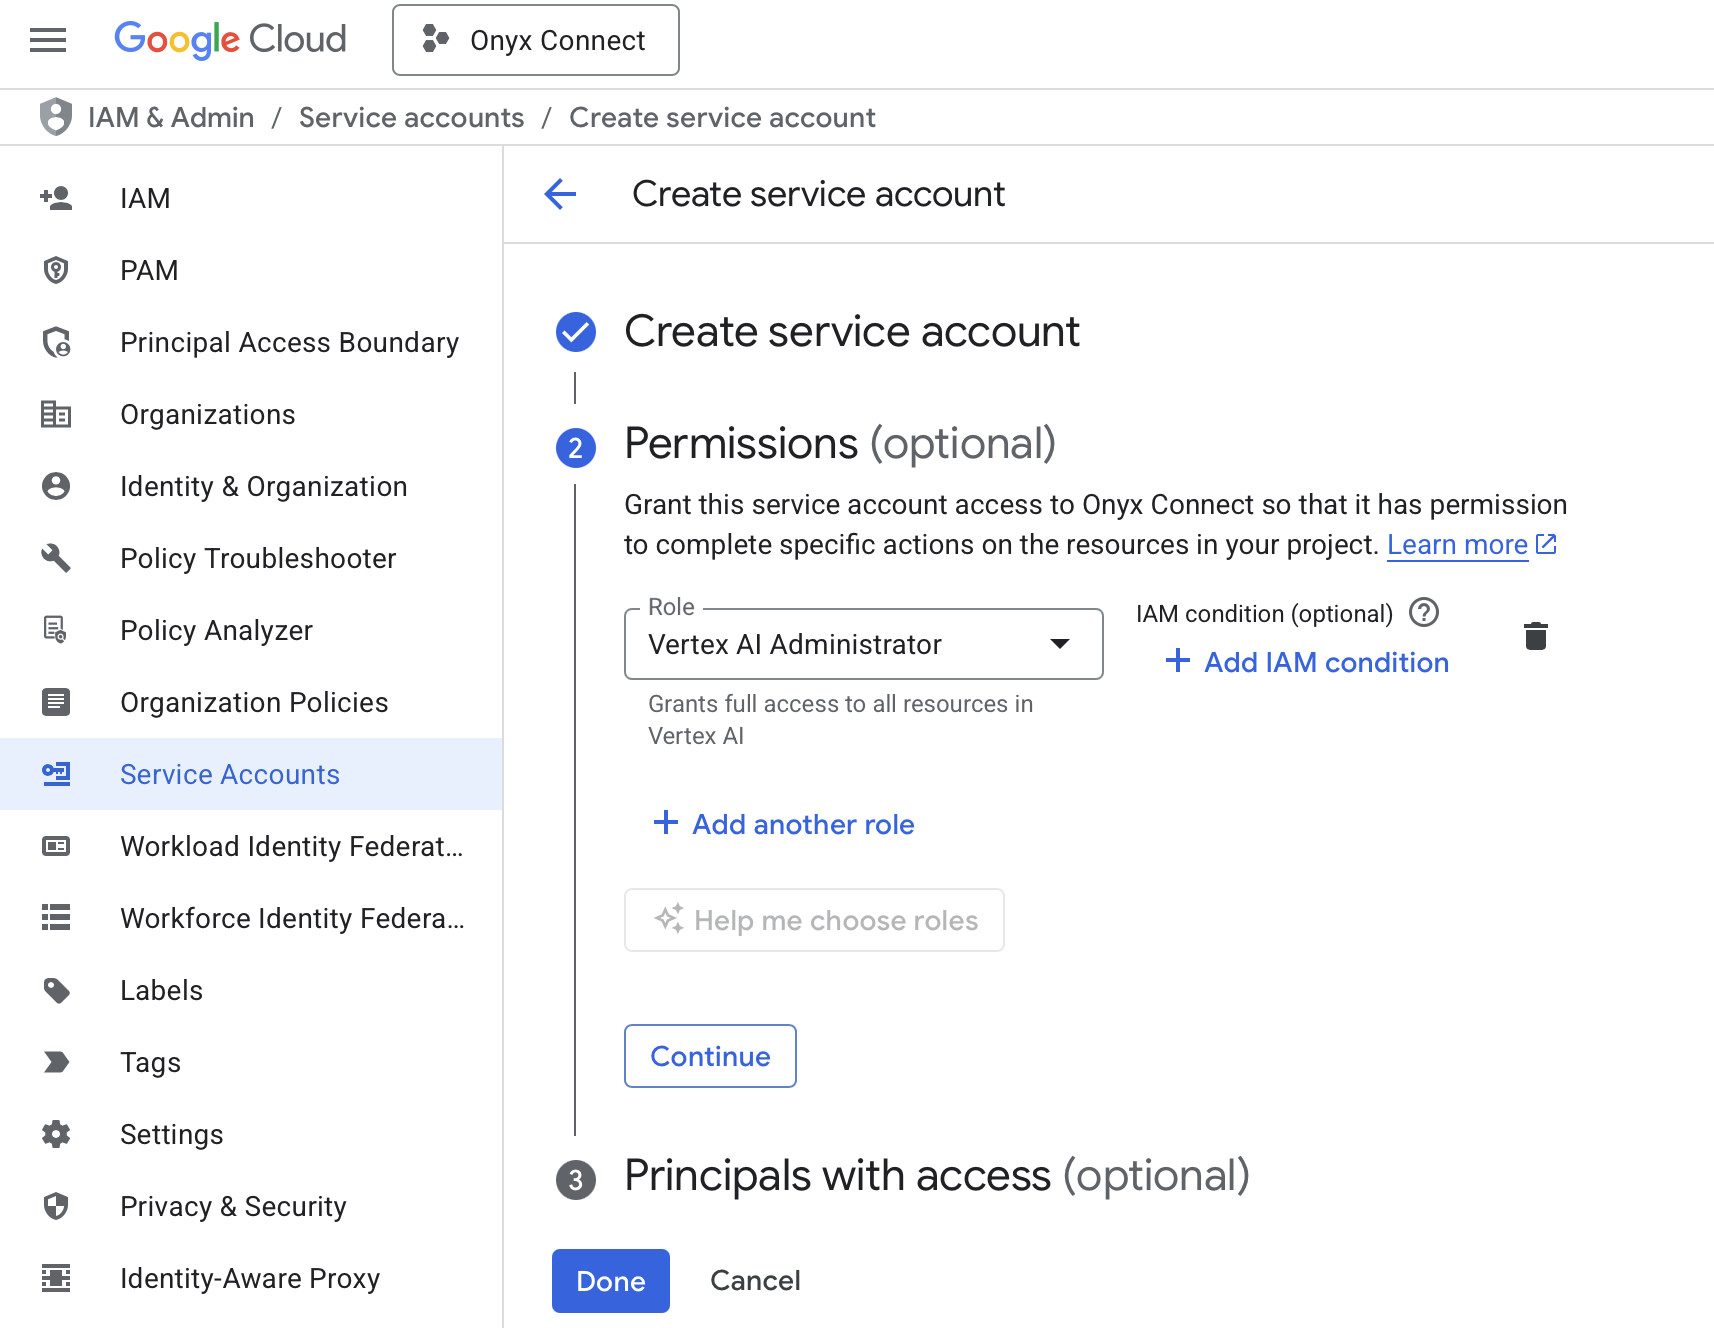
في علامة تبويب **الأذونات**، امنح حساب الخدمة دور **مسؤول Vertex AI**.
 انقر على حساب الخدمة الذي أنشأته حديثًا ← **المفاتيح** ← **إضافة مفتاح** ← **إنشاء مفتاح جديد**.
اختر **JSON** كنوع المفتاح وانقر على **إنشاء**. سيتم تنزيل المفتاح تلقائيًا إلى جهازك.
Access the Admin Panel from your user profile icon → **Admin Panel** → **LLM**
اختر **GCP Vertex AI** من المزودين المتاحين.
أعطِ هذا التكوين **اسمًا للعرض**.
حمل ملف JSON الخاص بك إلى حقل **ملف بيانات الاعتماد**.
إذا كان ذا صلة، حدد **موقعًا**.
The **Default Model** is selected automatically for new custom Agents and Chat sessions.
Designating a **Fast Model** is optional.
This **Fast Model** is used behind the scenes for quick operations such as evaluating the type of message,
generating different queries (query expansion), and naming the chat session.
If you select a Fast Model,
make sure it is a relatively quick and cost-effective model like GPT-4.1-mini or Claude 3.7 Sonnet.
In the **Advanced Options**, you will see a list of all models available from this provider.
You may choose which models are visible to your users in Gorbit.
Setting visible models is useful when a provider publishes multiple models and versions of the same model.
Lastly, you may select whether or not the provider is public to all users in Gorbit.
If set to private,
the provider's models will be available to Admins and User Groups you explicitly assign the provider to.
انقر على حساب الخدمة الذي أنشأته حديثًا ← **المفاتيح** ← **إضافة مفتاح** ← **إنشاء مفتاح جديد**.
اختر **JSON** كنوع المفتاح وانقر على **إنشاء**. سيتم تنزيل المفتاح تلقائيًا إلى جهازك.
Access the Admin Panel from your user profile icon → **Admin Panel** → **LLM**
اختر **GCP Vertex AI** من المزودين المتاحين.
أعطِ هذا التكوين **اسمًا للعرض**.
حمل ملف JSON الخاص بك إلى حقل **ملف بيانات الاعتماد**.
إذا كان ذا صلة، حدد **موقعًا**.
The **Default Model** is selected automatically for new custom Agents and Chat sessions.
Designating a **Fast Model** is optional.
This **Fast Model** is used behind the scenes for quick operations such as evaluating the type of message,
generating different queries (query expansion), and naming the chat session.
If you select a Fast Model,
make sure it is a relatively quick and cost-effective model like GPT-4.1-mini or Claude 3.7 Sonnet.
In the **Advanced Options**, you will see a list of all models available from this provider.
You may choose which models are visible to your users in Gorbit.
Setting visible models is useful when a provider publishes multiple models and versions of the same model.
Lastly, you may select whether or not the provider is public to all users in Gorbit.
If set to private,
the provider's models will be available to Admins and User Groups you explicitly assign the provider to.