> ## Documentation Index
> Fetch the complete documentation index at: https://docs.gorbit.cloud/llms.txt
> Use this file to discover all available pages before exploring further.
# Curator Guide
> Example guide for Curators to create and manage Connectors, Document Sets, and Agents
## Adding Connectors
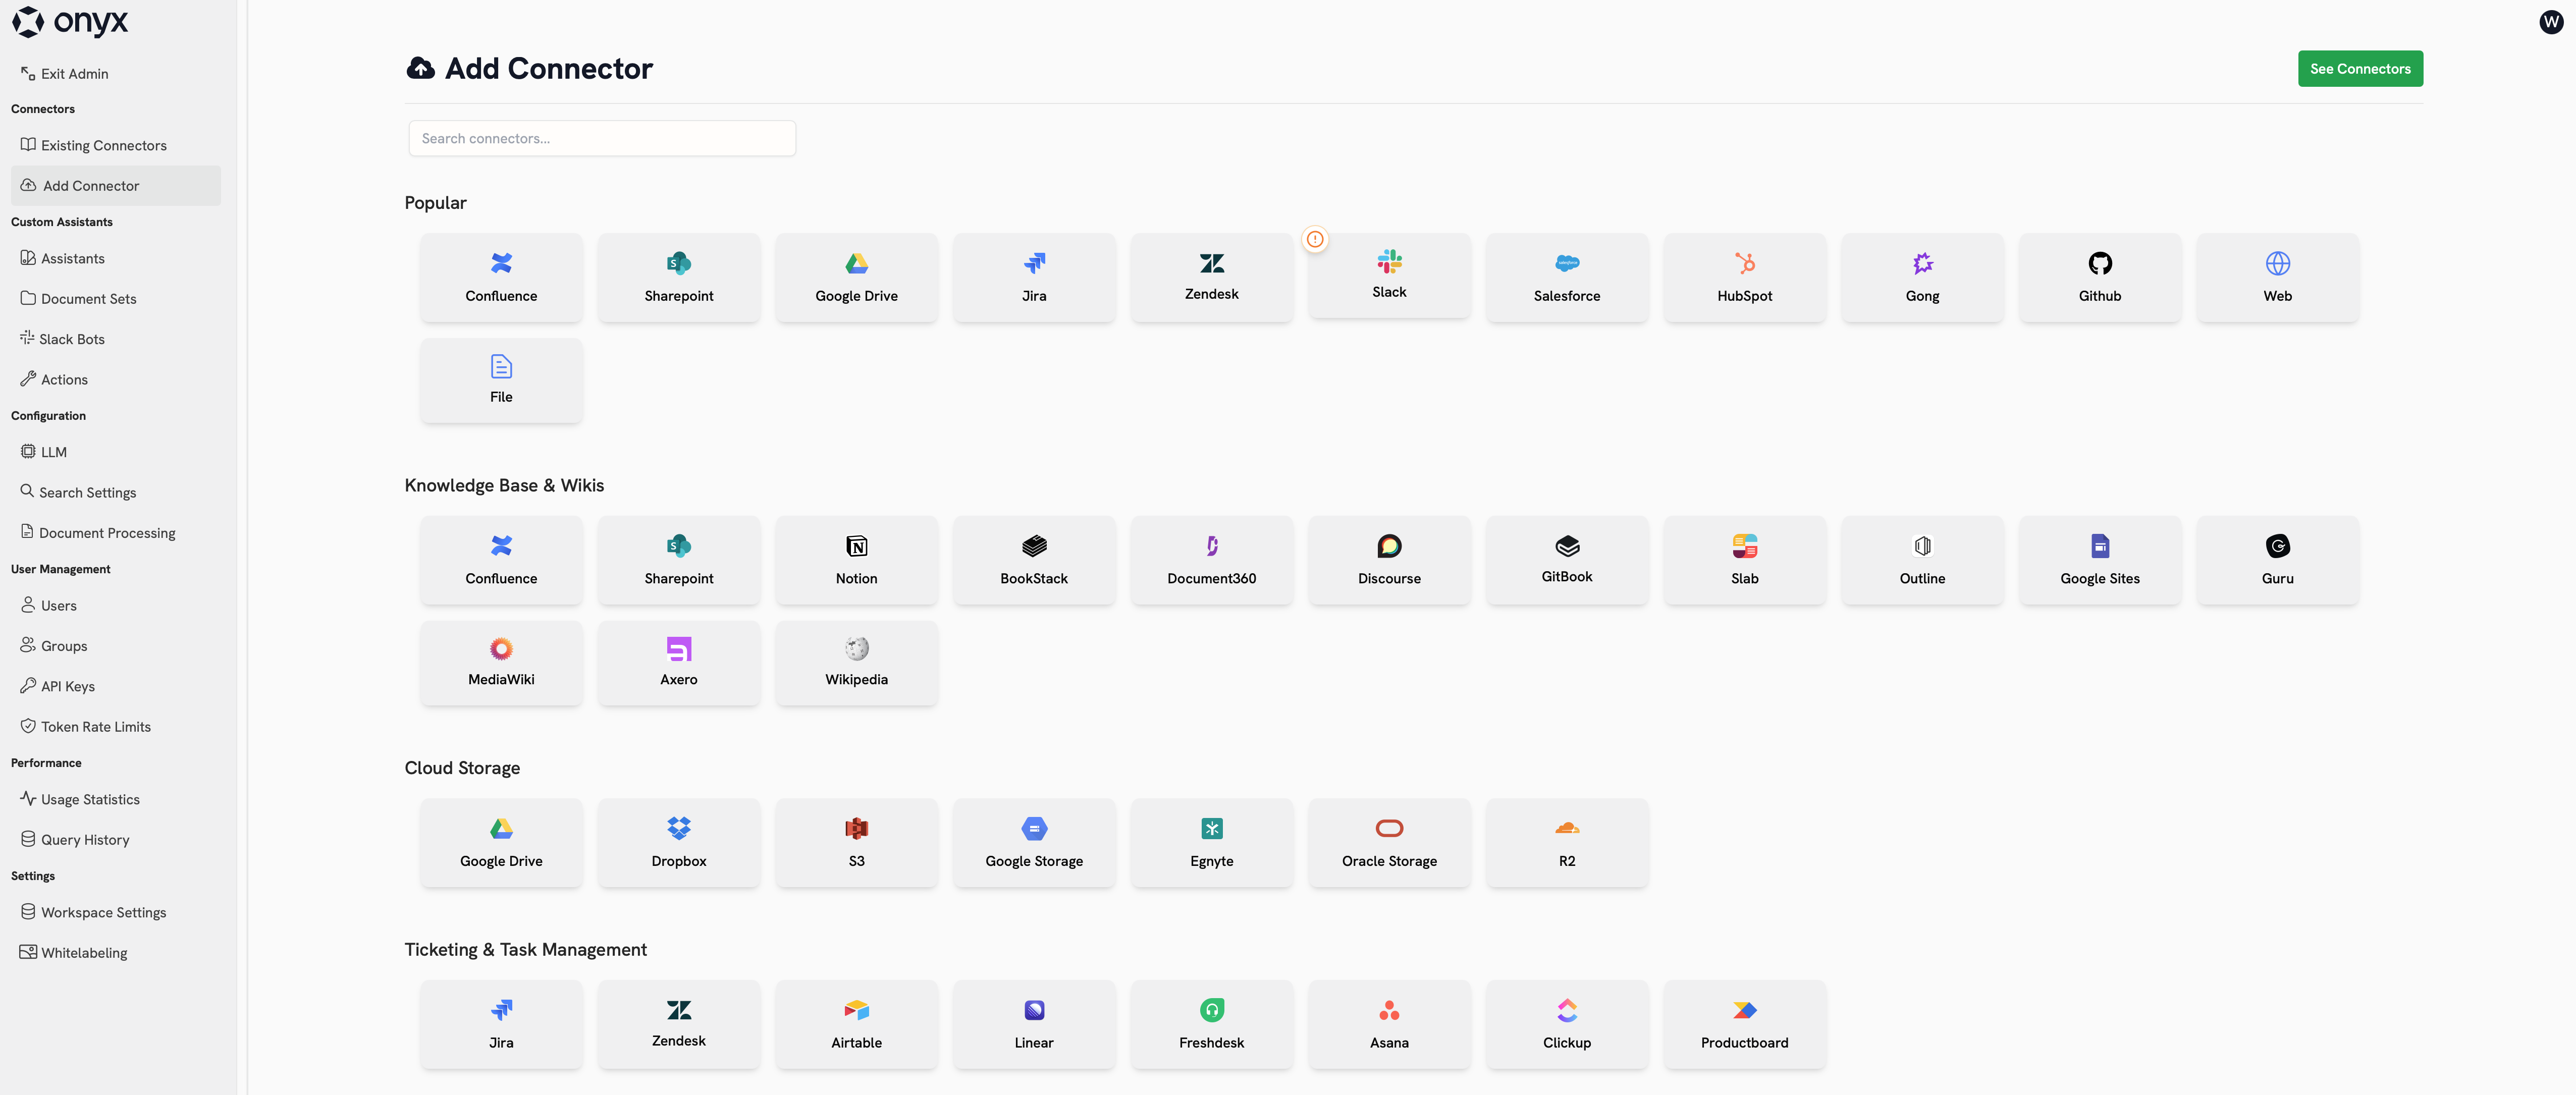
To create a new Connector as a Curator,
navigate to the **Connectors** section in your Curator Panel and click **Add Connector**.
Curators can create Connectors for their assigned User Groups.
These Connectors will be available to group members and can be used in Agents.
 For detailed information about all available Connectors, configuration options, and troubleshooting,
see the [Connectors Overview](/admins/connectors/overview).
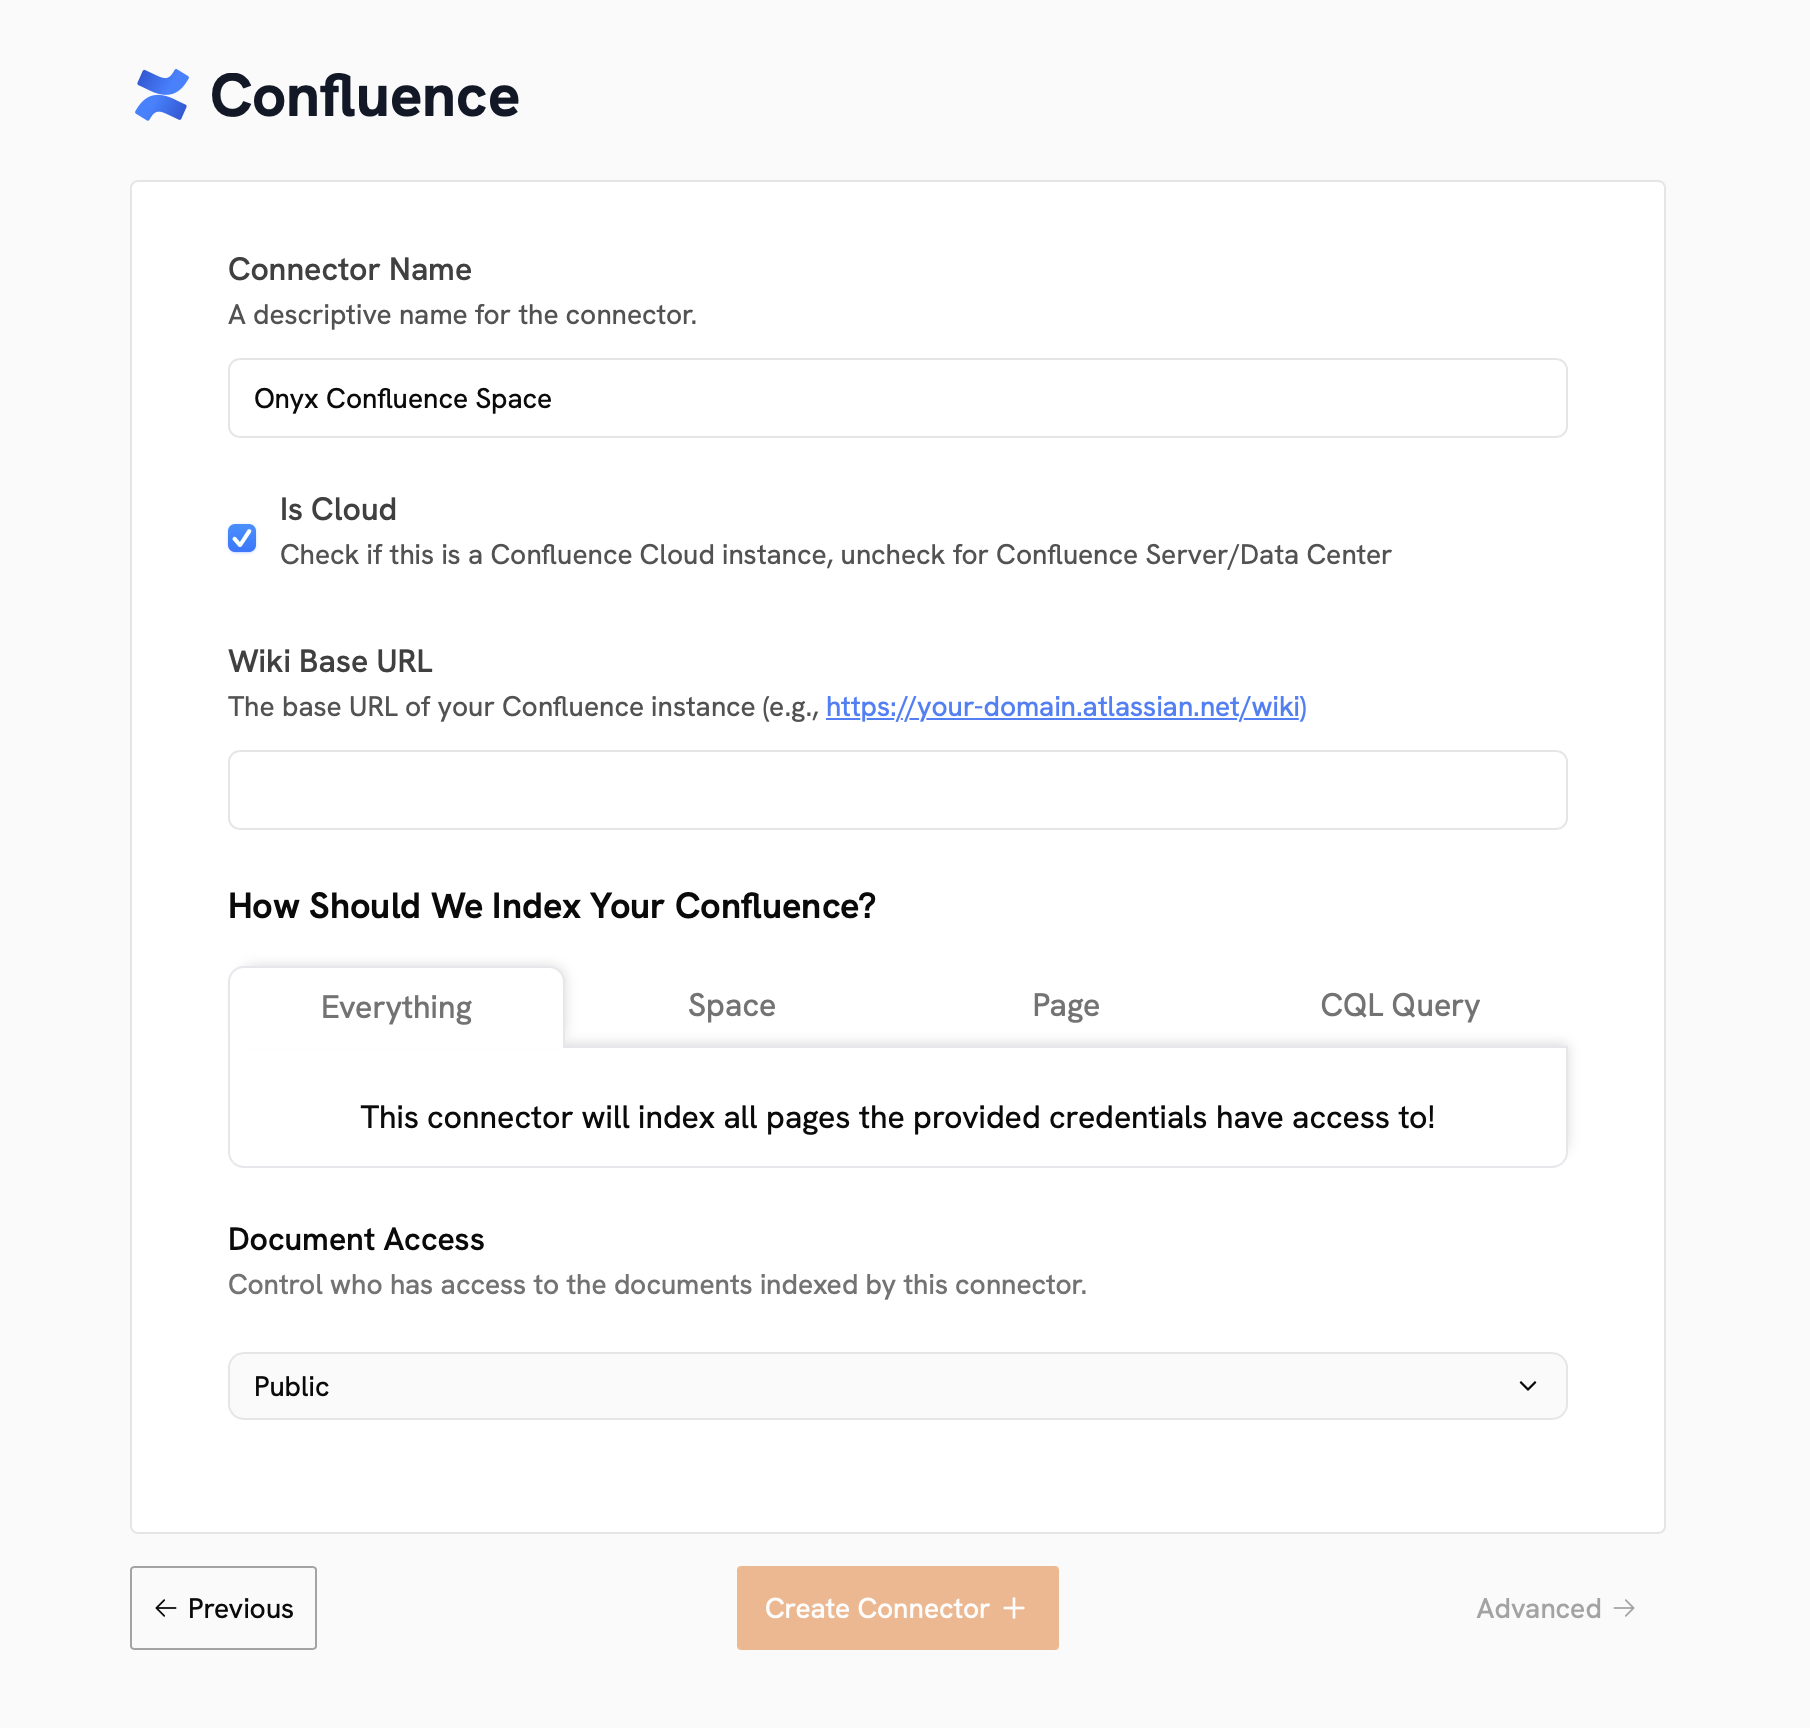
### Connector Configuration
Each Connector requires:
* **Name**: A descriptive name for your data source
* **Credentials**: Authentication details for accessing your source
* **Configuration**: Specific settings for data indexing
* **Access Controls**: Permissions for who can use this Connector
For detailed information about all available Connectors, configuration options, and troubleshooting,
see the [Connectors Overview](/admins/connectors/overview).
### Connector Configuration
Each Connector requires:
* **Name**: A descriptive name for your data source
* **Credentials**: Authentication details for accessing your source
* **Configuration**: Specific settings for data indexing
* **Access Controls**: Permissions for who can use this Connector
 ### Managing Existing Connectors
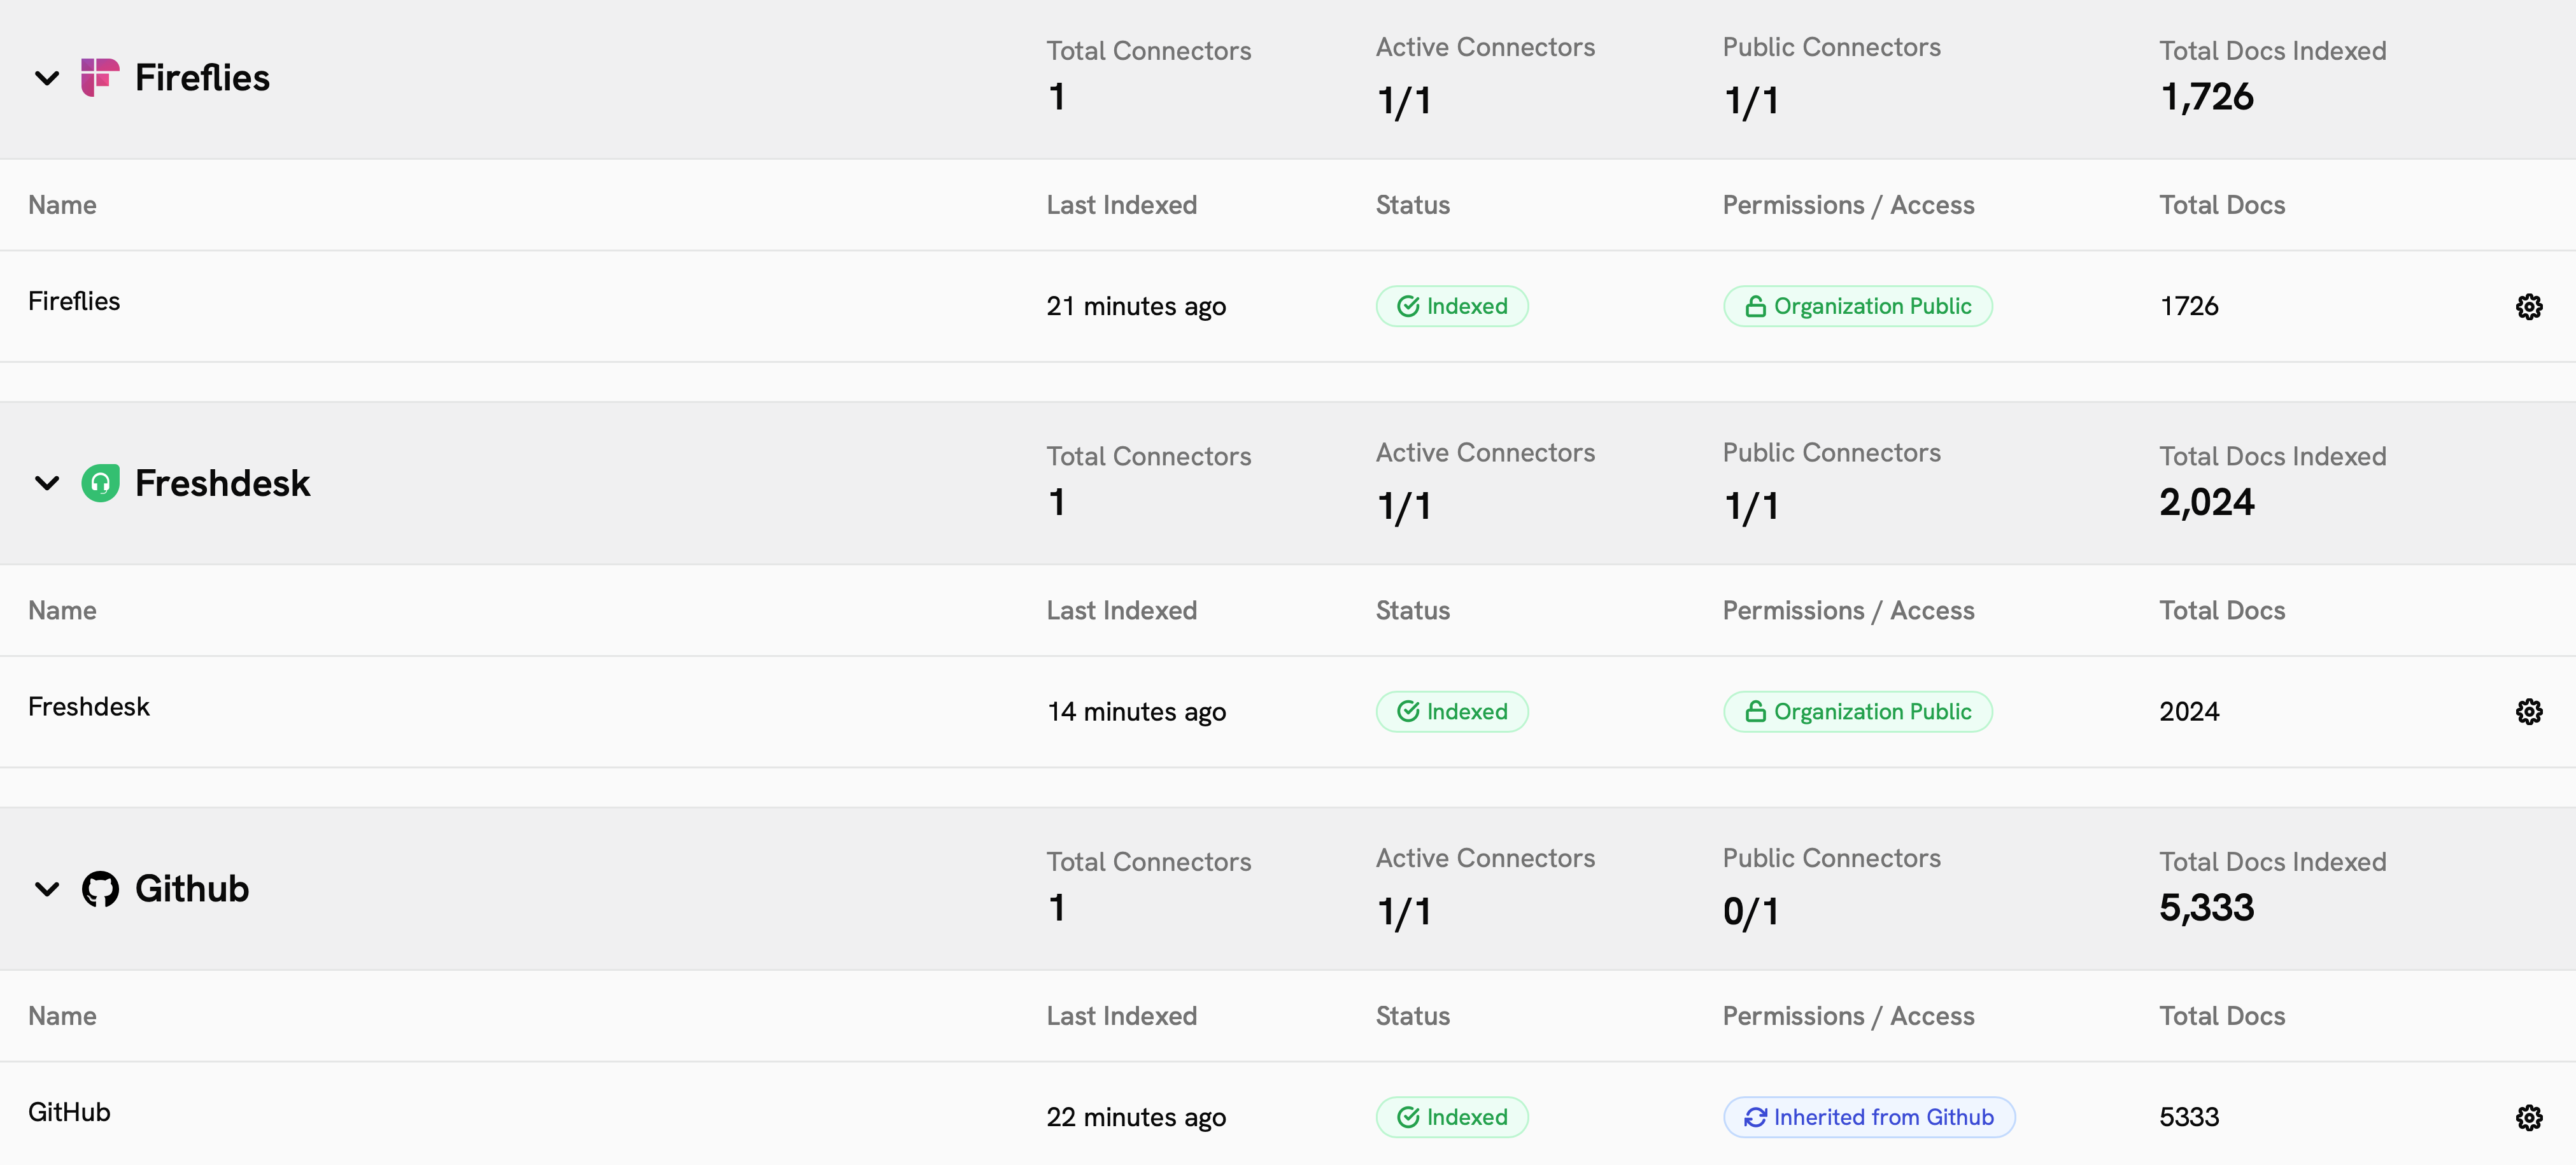
View and manage your existing Connectors from the **Existing Connectors** page. Here you can:
* Monitor indexing status and progress
* Update configuration settings
* Manage access permissions
* View usage analytics
### Managing Existing Connectors
View and manage your existing Connectors from the **Existing Connectors** page. Here you can:
* Monitor indexing status and progress
* Update configuration settings
* Manage access permissions
* View usage analytics
 ## Document Sets
Document Sets allow you to group related Connectors together,
making it easier to organize content and assign specific knowledge sources to your Agents.
### Creating Document Sets
In your Curator Panel, go to the **Document Sets** section.
Click **Create Document Set** and provide a name and description for your document collection.
Select which Connectors should be included in this Document Set.
You can combine multiple data sources into a single knowledge base.
### Document Set Benefits
Document Sets provide several advantages:
* **Organized Knowledge**: Group related content from different sources
* **Simplified Agent Creation**: Assign entire document collections to Agents
* **Access Control**: Manage permissions at the document set level
* **Search Filtering**: Enable users to search within specific document collections
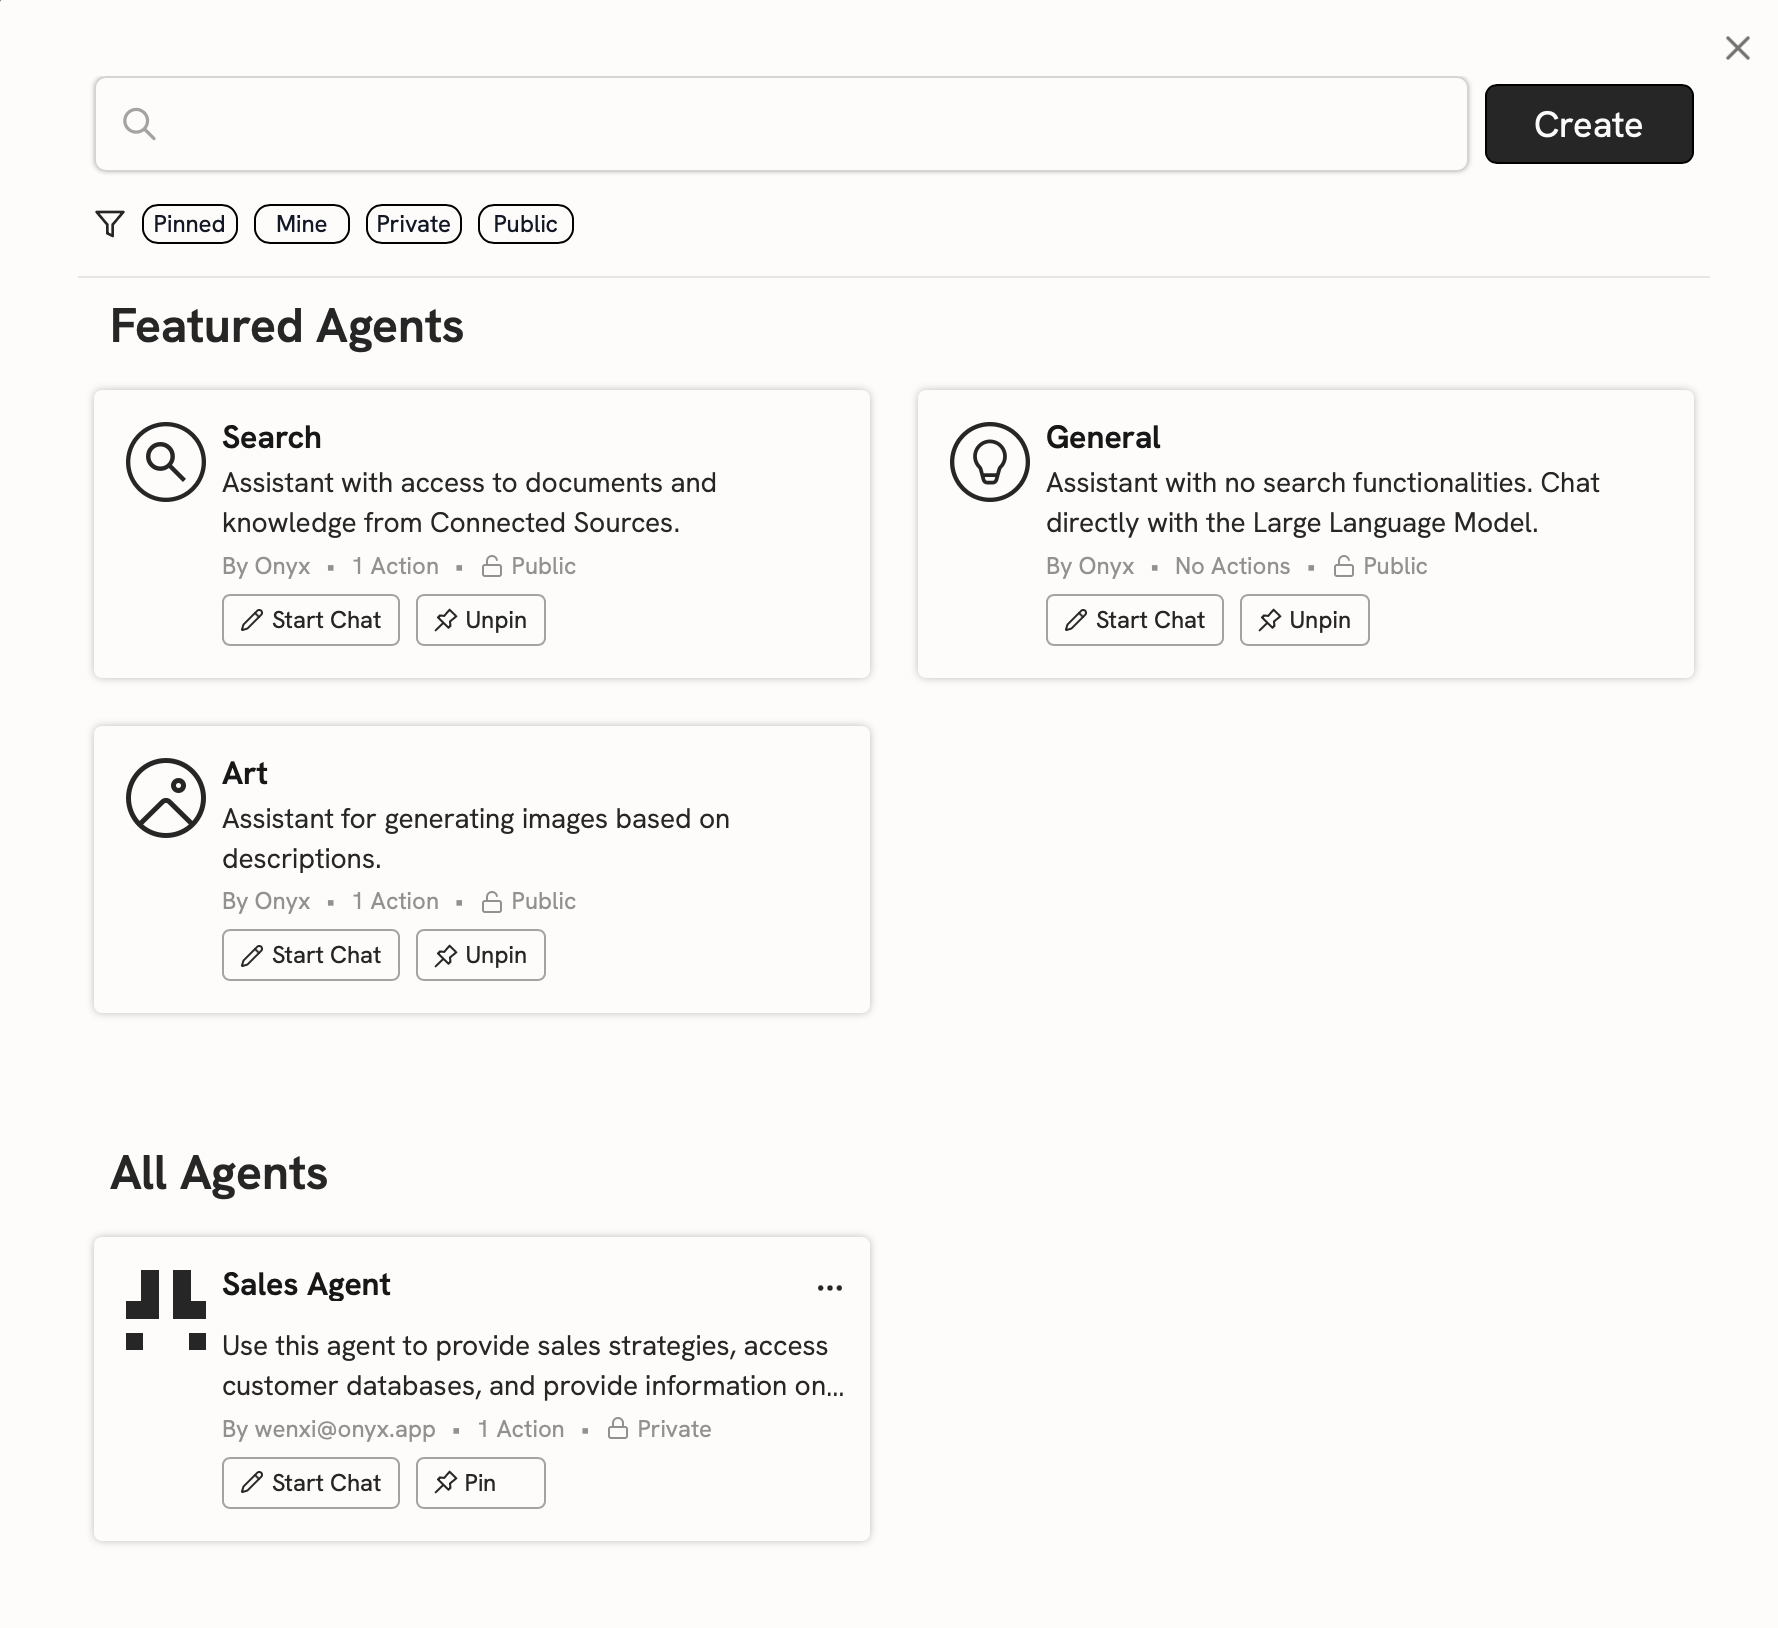
## Creating Custom Agents
Agents are the primary way Curators deliver specialized AI assistance to their teams.
These AI assistants can be configured with specific knowledge sources, instructions, and capabilities.
## Document Sets
Document Sets allow you to group related Connectors together,
making it easier to organize content and assign specific knowledge sources to your Agents.
### Creating Document Sets
In your Curator Panel, go to the **Document Sets** section.
Click **Create Document Set** and provide a name and description for your document collection.
Select which Connectors should be included in this Document Set.
You can combine multiple data sources into a single knowledge base.
### Document Set Benefits
Document Sets provide several advantages:
* **Organized Knowledge**: Group related content from different sources
* **Simplified Agent Creation**: Assign entire document collections to Agents
* **Access Control**: Manage permissions at the document set level
* **Search Filtering**: Enable users to search within specific document collections
## Creating Custom Agents
Agents are the primary way Curators deliver specialized AI assistance to their teams.
These AI assistants can be configured with specific knowledge sources, instructions, and capabilities.
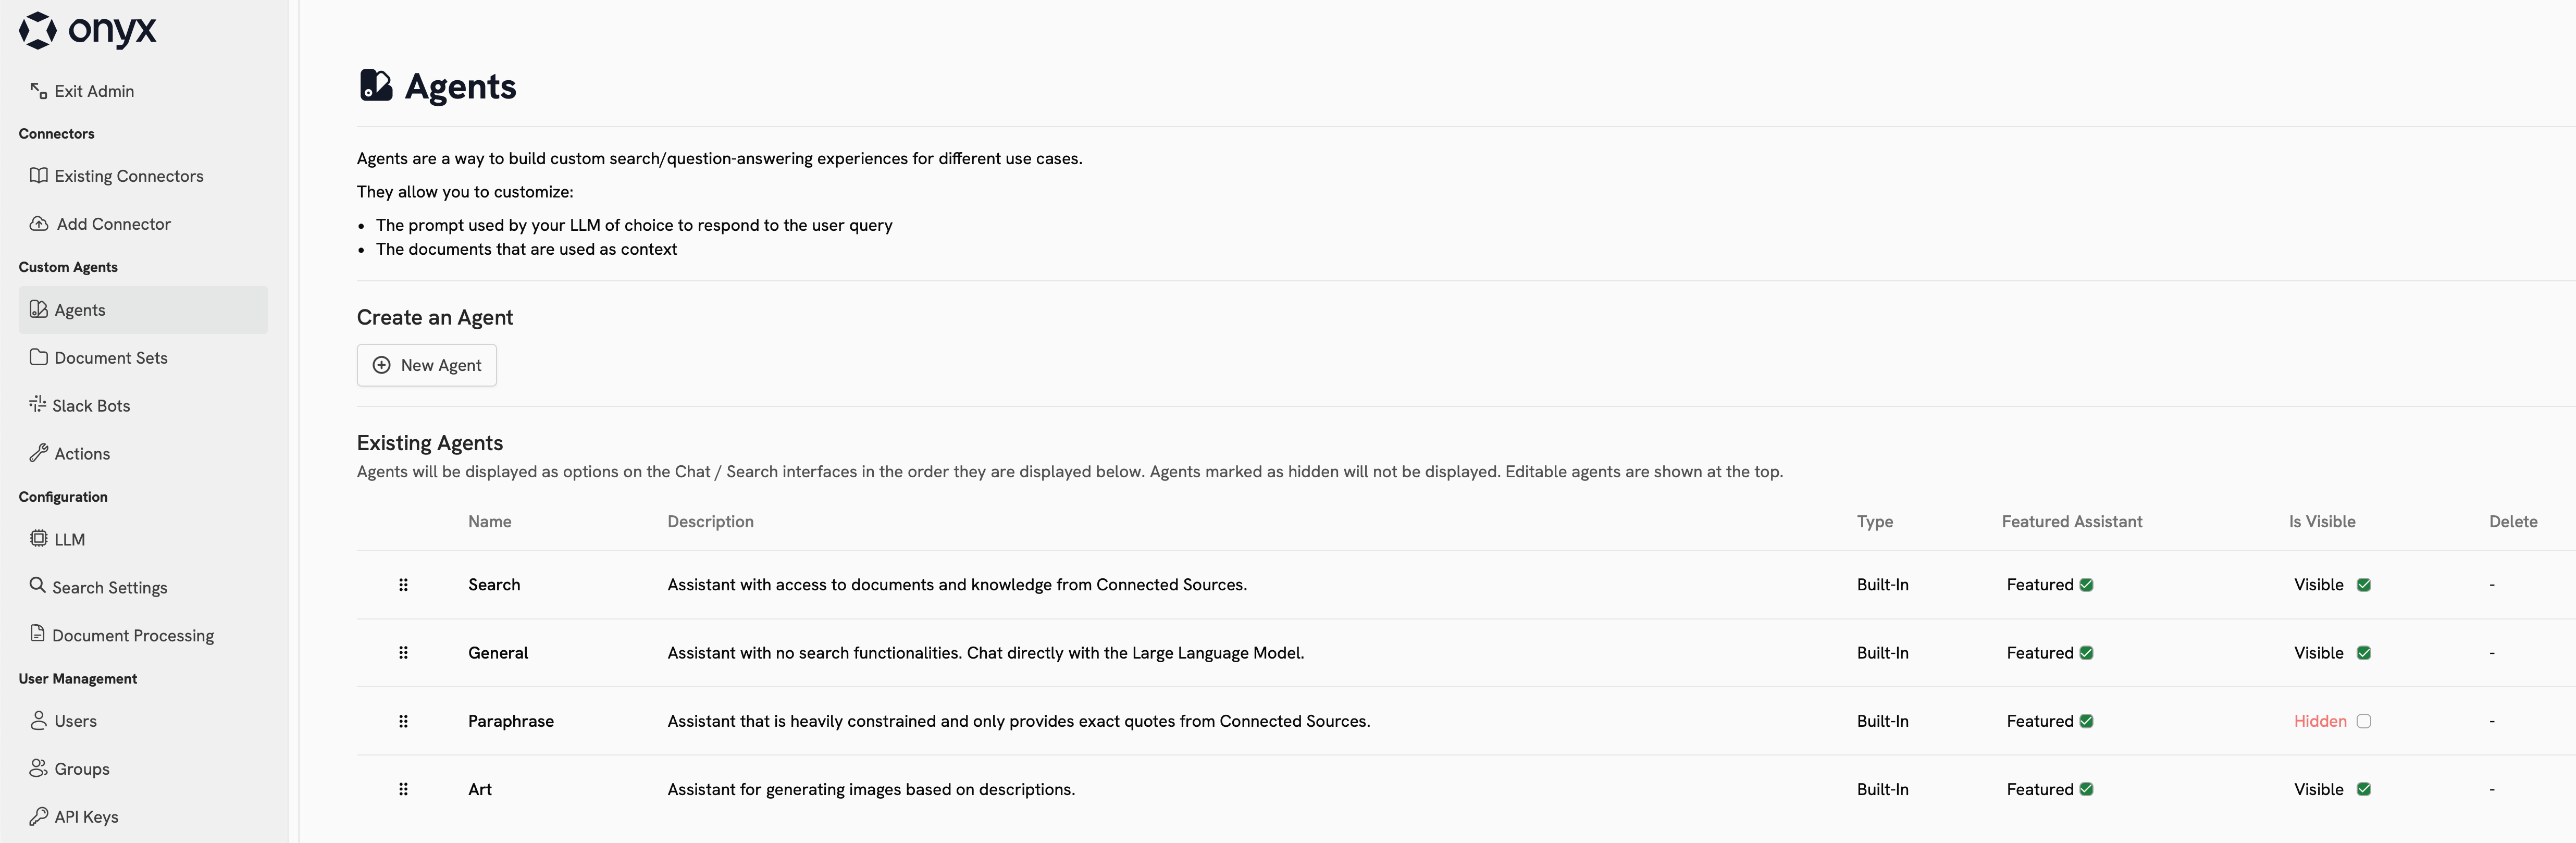 For comprehensive information about Agent configuration options, management features, and advanced settings,
see the [Agents Overview](/admins/agents/overview).
### Agent Creation Process
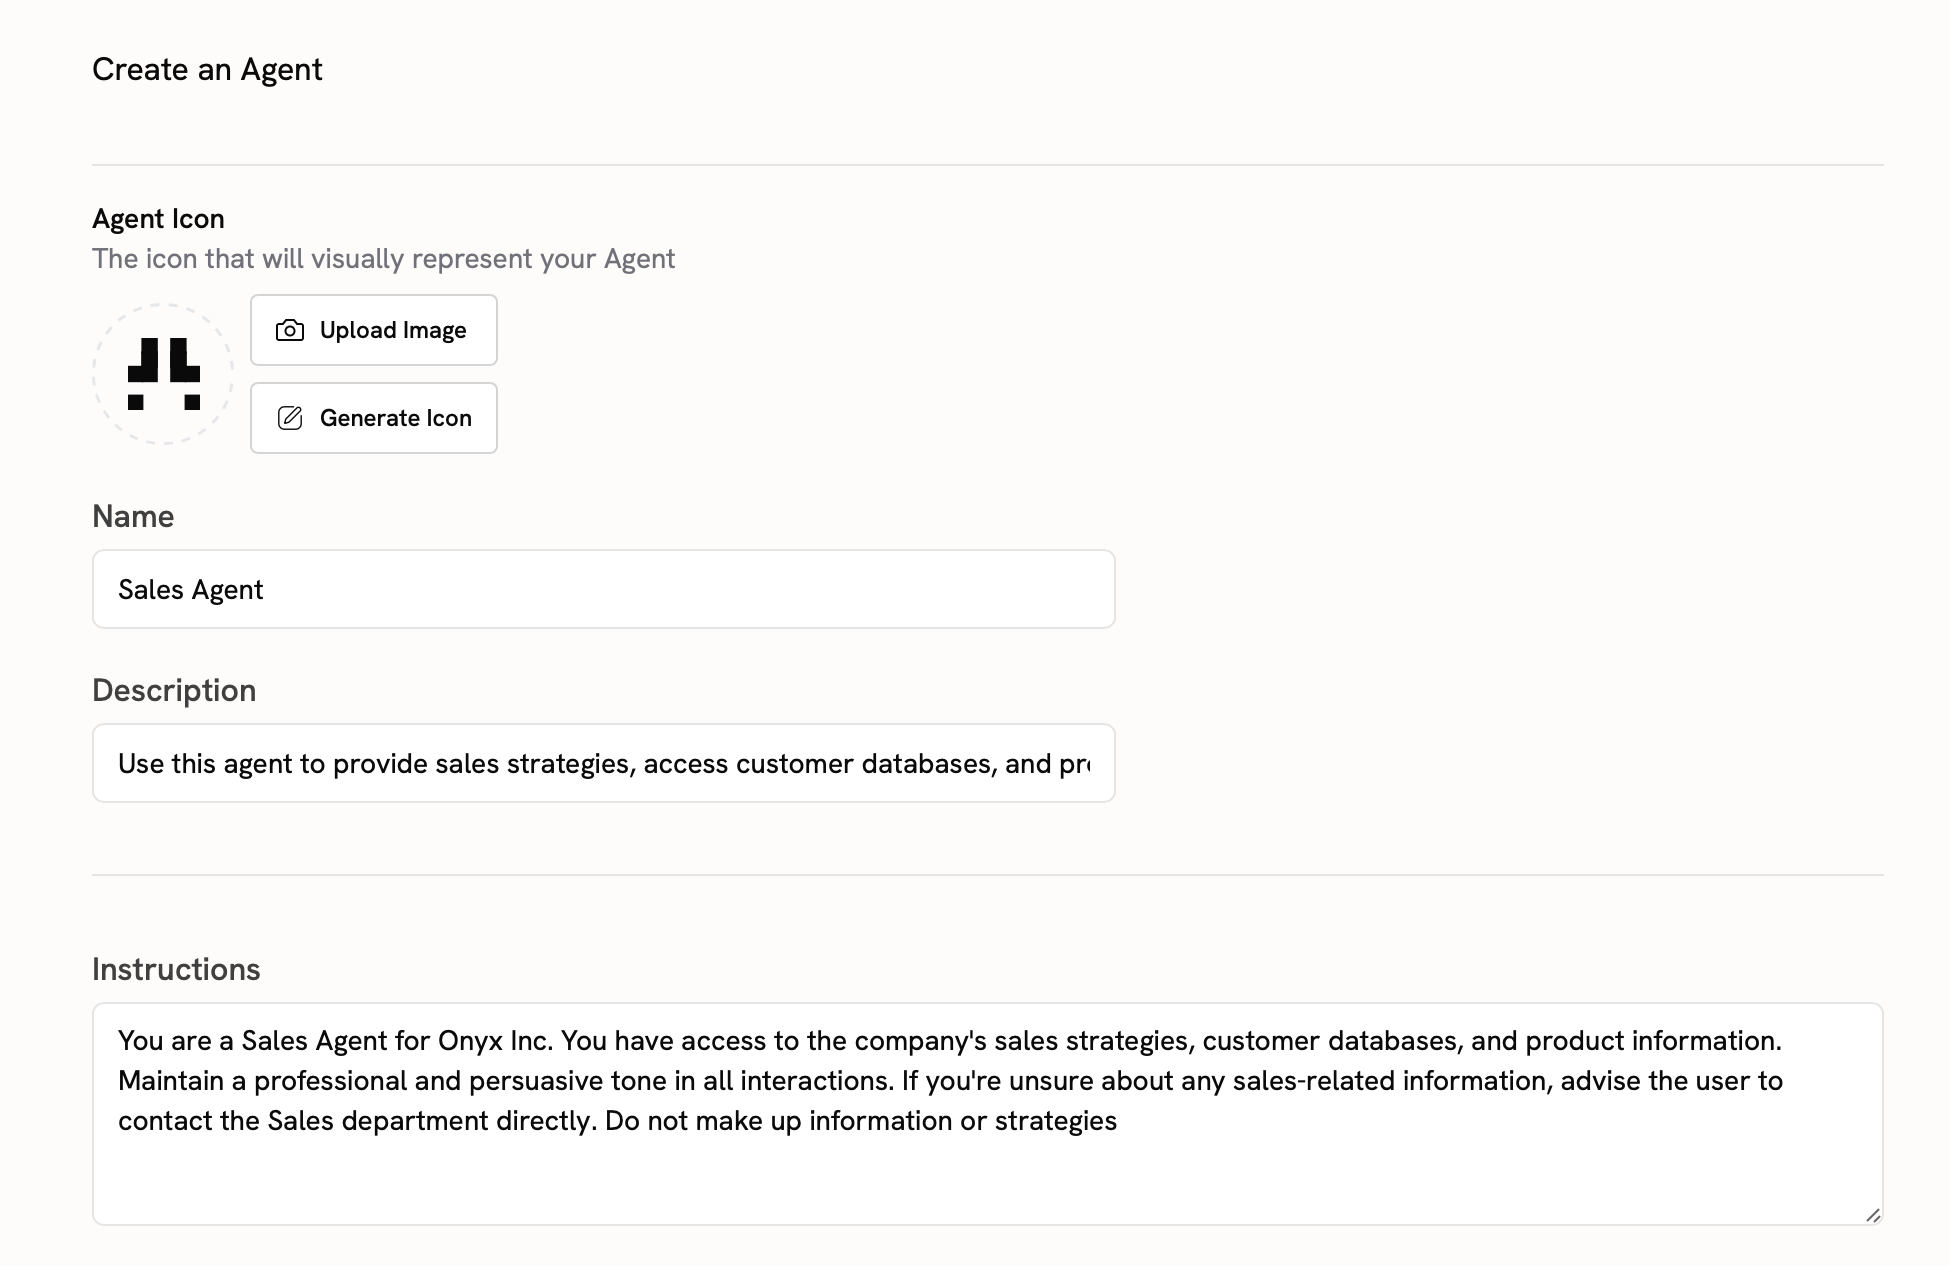
Navigate to the **Agents** section in your Curator Panel and click **Create New Agent**.
Configure your Agent's fundamental properties:
* **Name**: A clear, descriptive name for your Agent
* **Description**: Brief explanation of the Agent's purpose
* **Instructions**: Detailed prompt defining how the Agent should behave
* **Icon**: Optional visual identifier for your Agent
For comprehensive information about Agent configuration options, management features, and advanced settings,
see the [Agents Overview](/admins/agents/overview).
### Agent Creation Process
Navigate to the **Agents** section in your Curator Panel and click **Create New Agent**.
Configure your Agent's fundamental properties:
* **Name**: A clear, descriptive name for your Agent
* **Description**: Brief explanation of the Agent's purpose
* **Instructions**: Detailed prompt defining how the Agent should behave
* **Icon**: Optional visual identifier for your Agent
 Assign knowledge sources to your Agent by selecting:
* **Document Sets**: Pre-organized collections of related documents
* **Individual Connectors**: Specific data sources
* **User Knowledge**: Personal documents (for private Agents)
Assign knowledge sources to your Agent by selecting:
* **Document Sets**: Pre-organized collections of related documents
* **Individual Connectors**: Specific data sources
* **User Knowledge**: Personal documents (for private Agents)
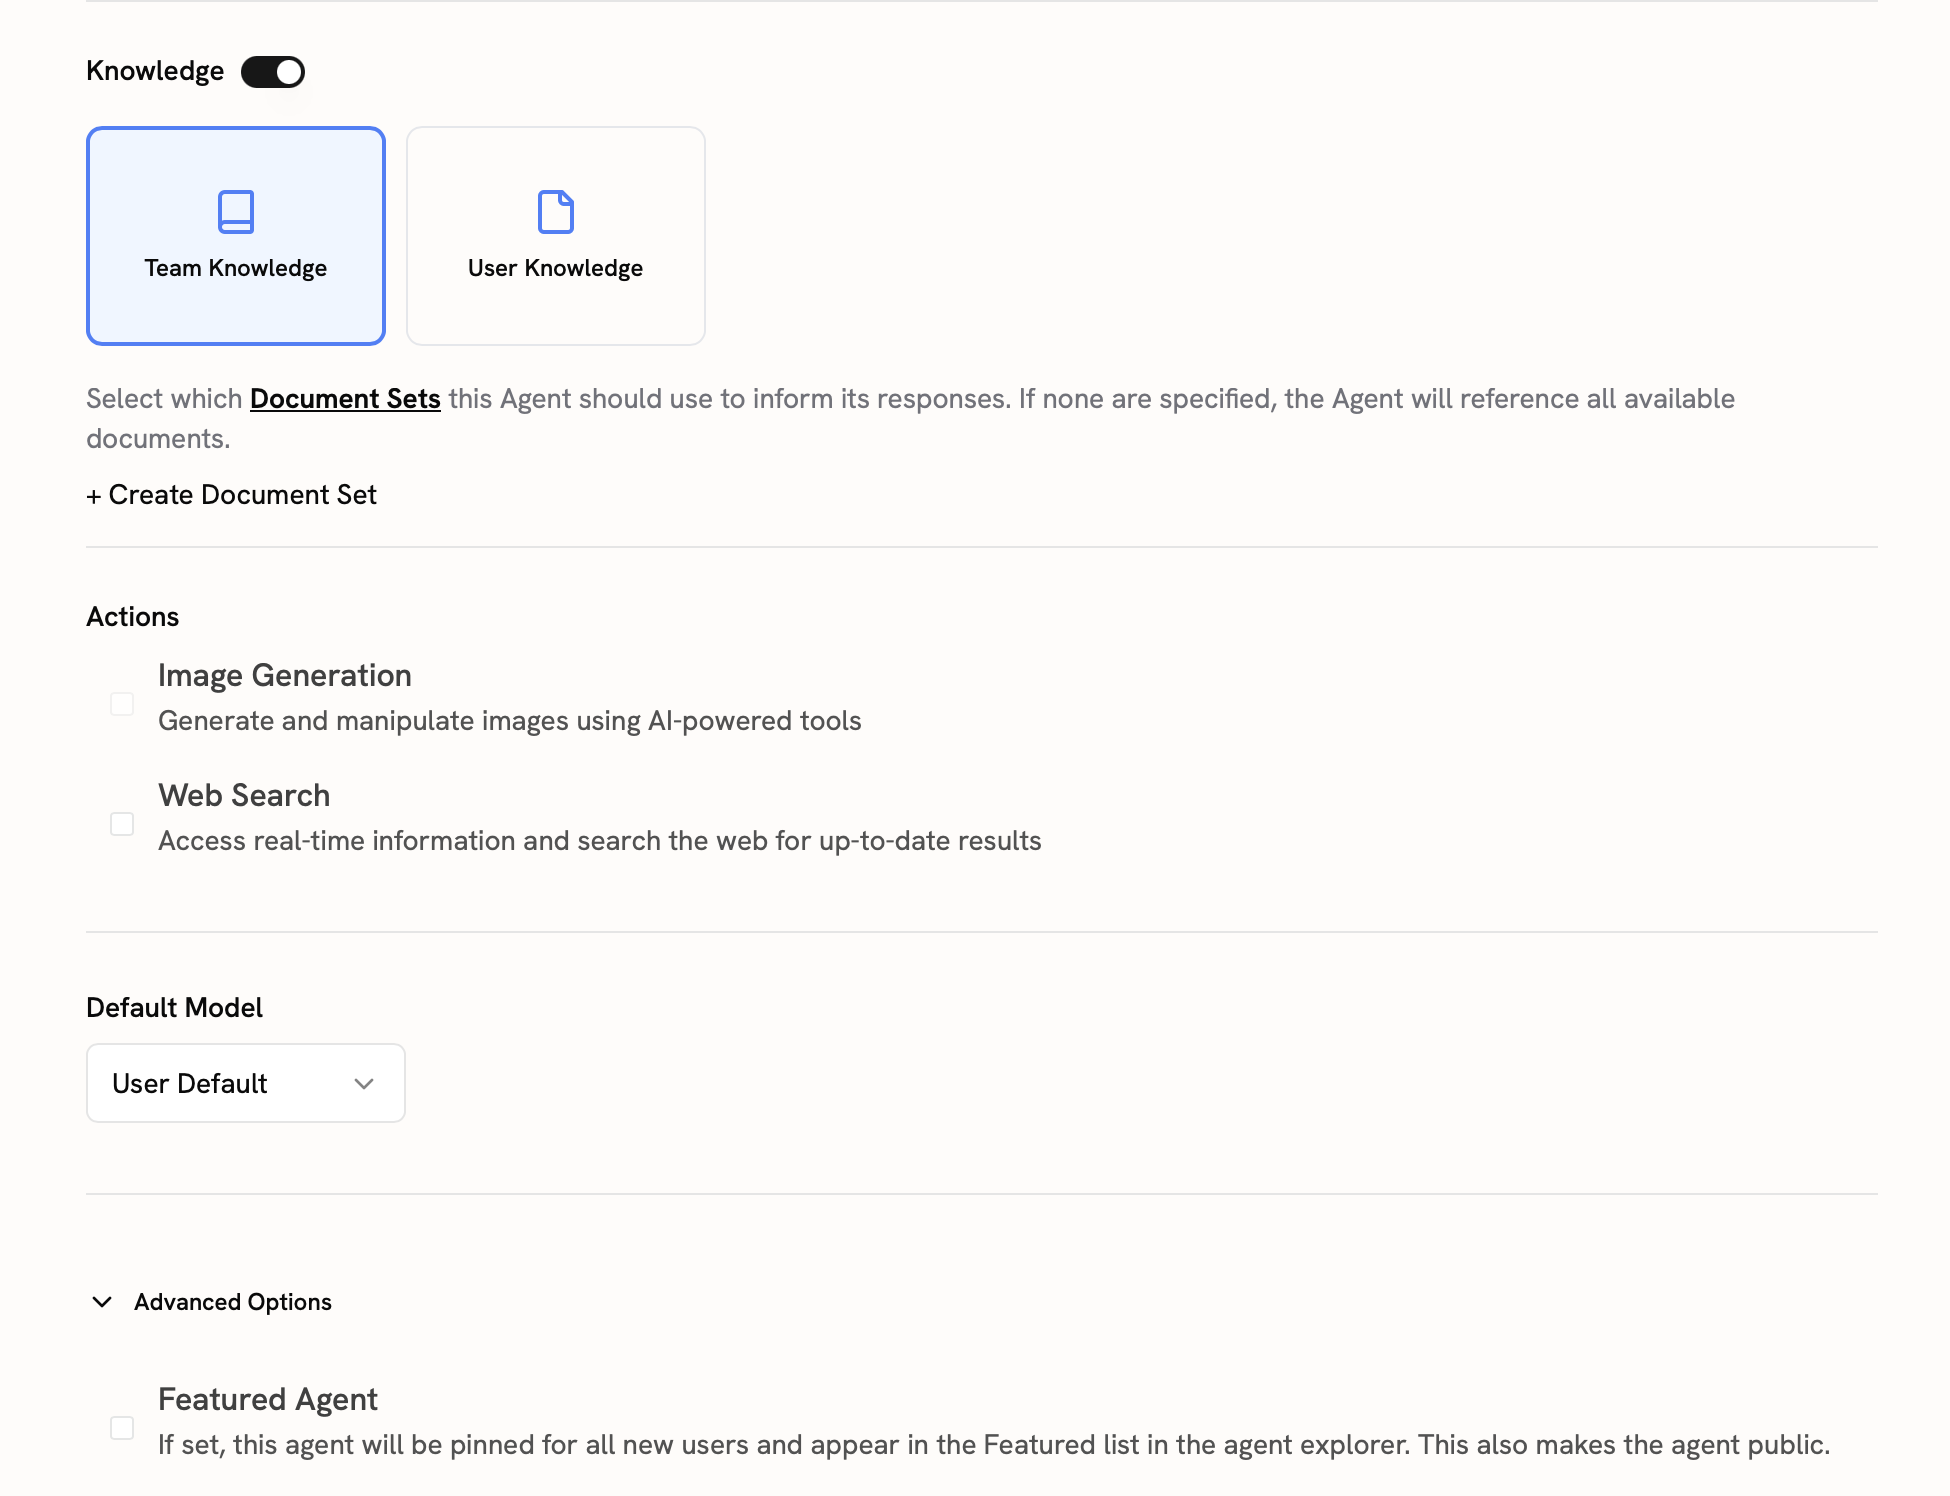 Configure which Actions your Agent can perform:
* **Web Search**: Enable internet search capabilities
* **File Upload**: Allow users to upload documents
* **Custom Actions**: MCP or OpenAPI-based custom tools
For more information about available Actions and creating custom Actions,
see the [Actions Overview](/admins/actions/overview).
Define who can access your Agent:
* **Private**: Only you and selected users
* **Group Access**: Available to specific User Groups
* **Organization-wide**: Public to all users (requires approval)
Configure starter messages and labels to help users understand your Agent's capabilities.
Configure which Actions your Agent can perform:
* **Web Search**: Enable internet search capabilities
* **File Upload**: Allow users to upload documents
* **Custom Actions**: MCP or OpenAPI-based custom tools
For more information about available Actions and creating custom Actions,
see the [Actions Overview](/admins/actions/overview).
Define who can access your Agent:
* **Private**: Only you and selected users
* **Group Access**: Available to specific User Groups
* **Organization-wide**: Public to all users (requires approval)
Configure starter messages and labels to help users understand your Agent's capabilities.
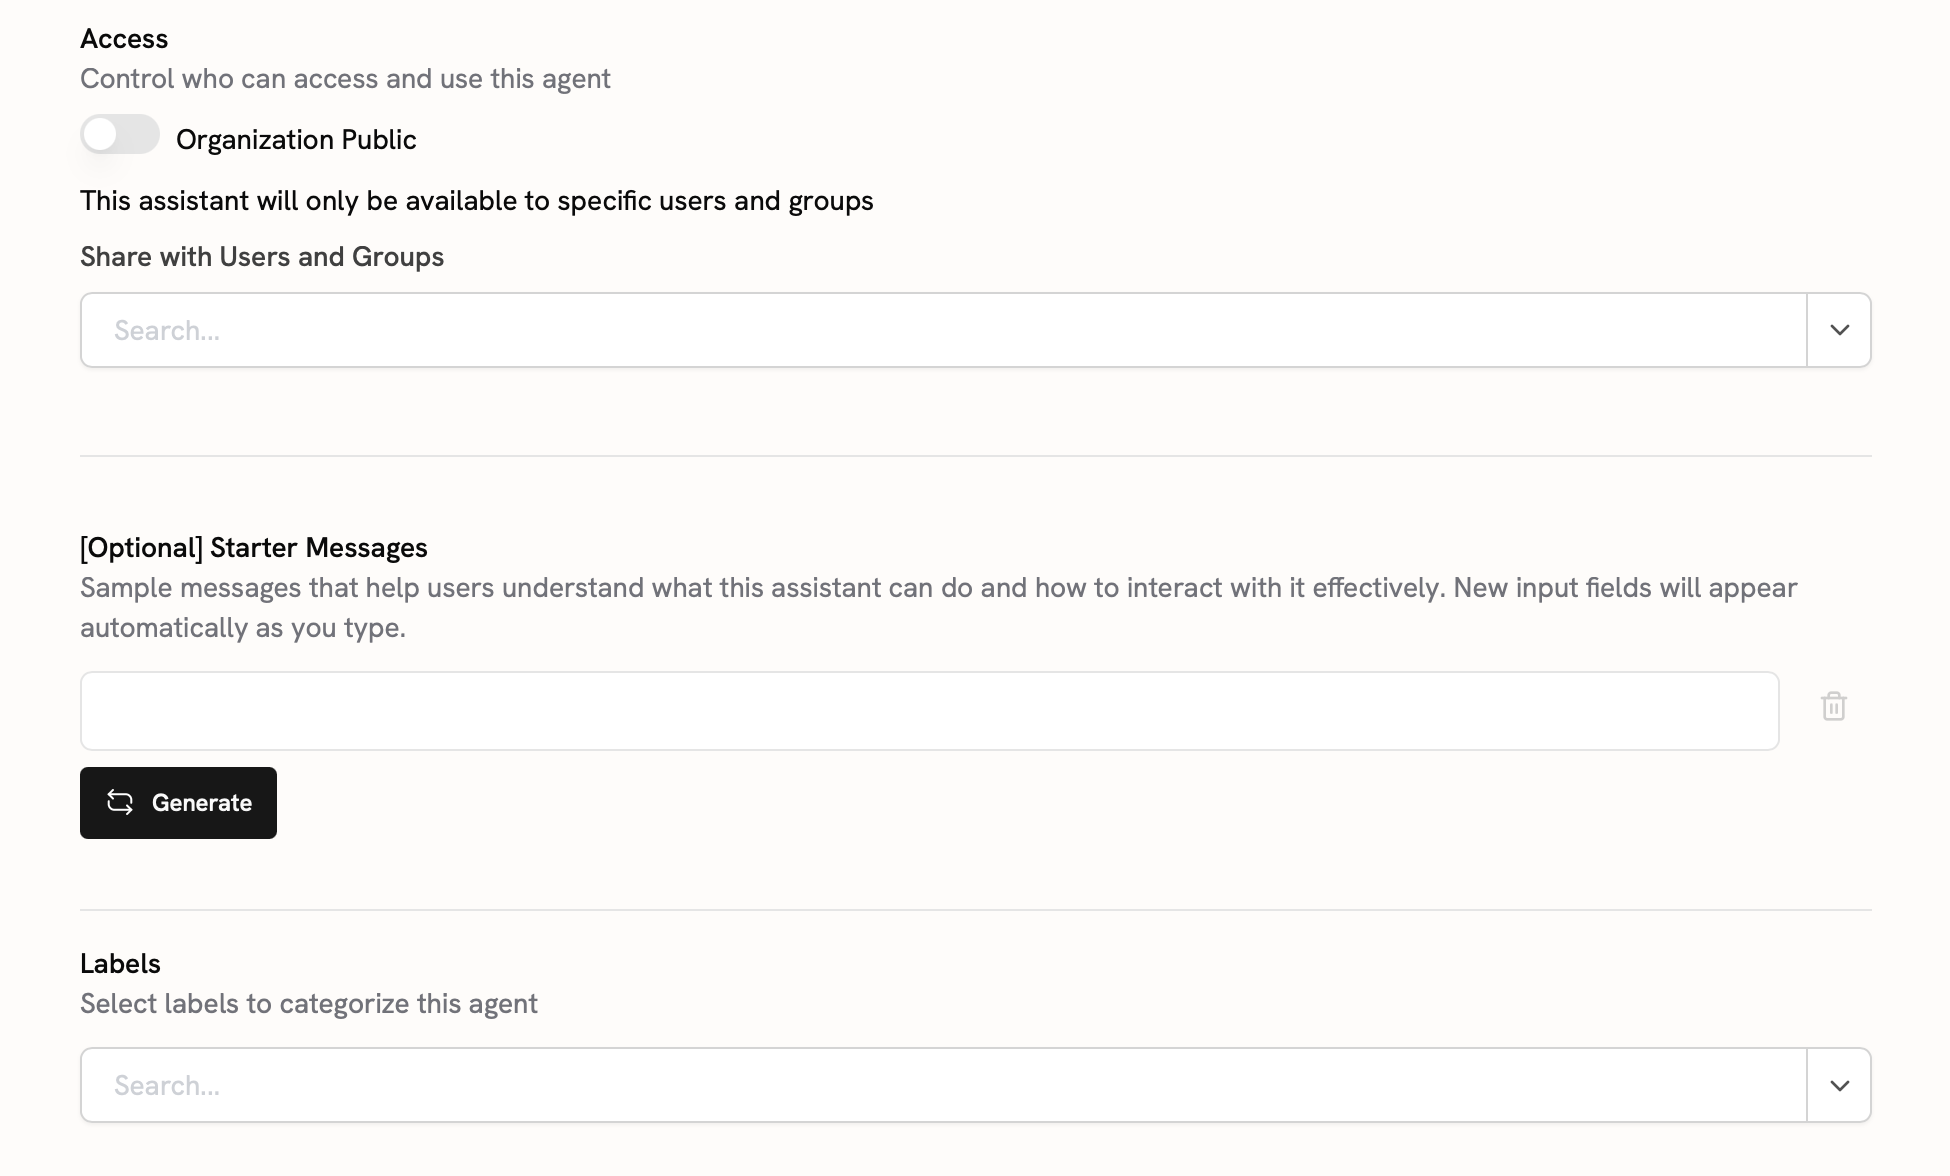 For more information about User Groups and access management,
see [User Management](/admins/user_management/users_and_groups).
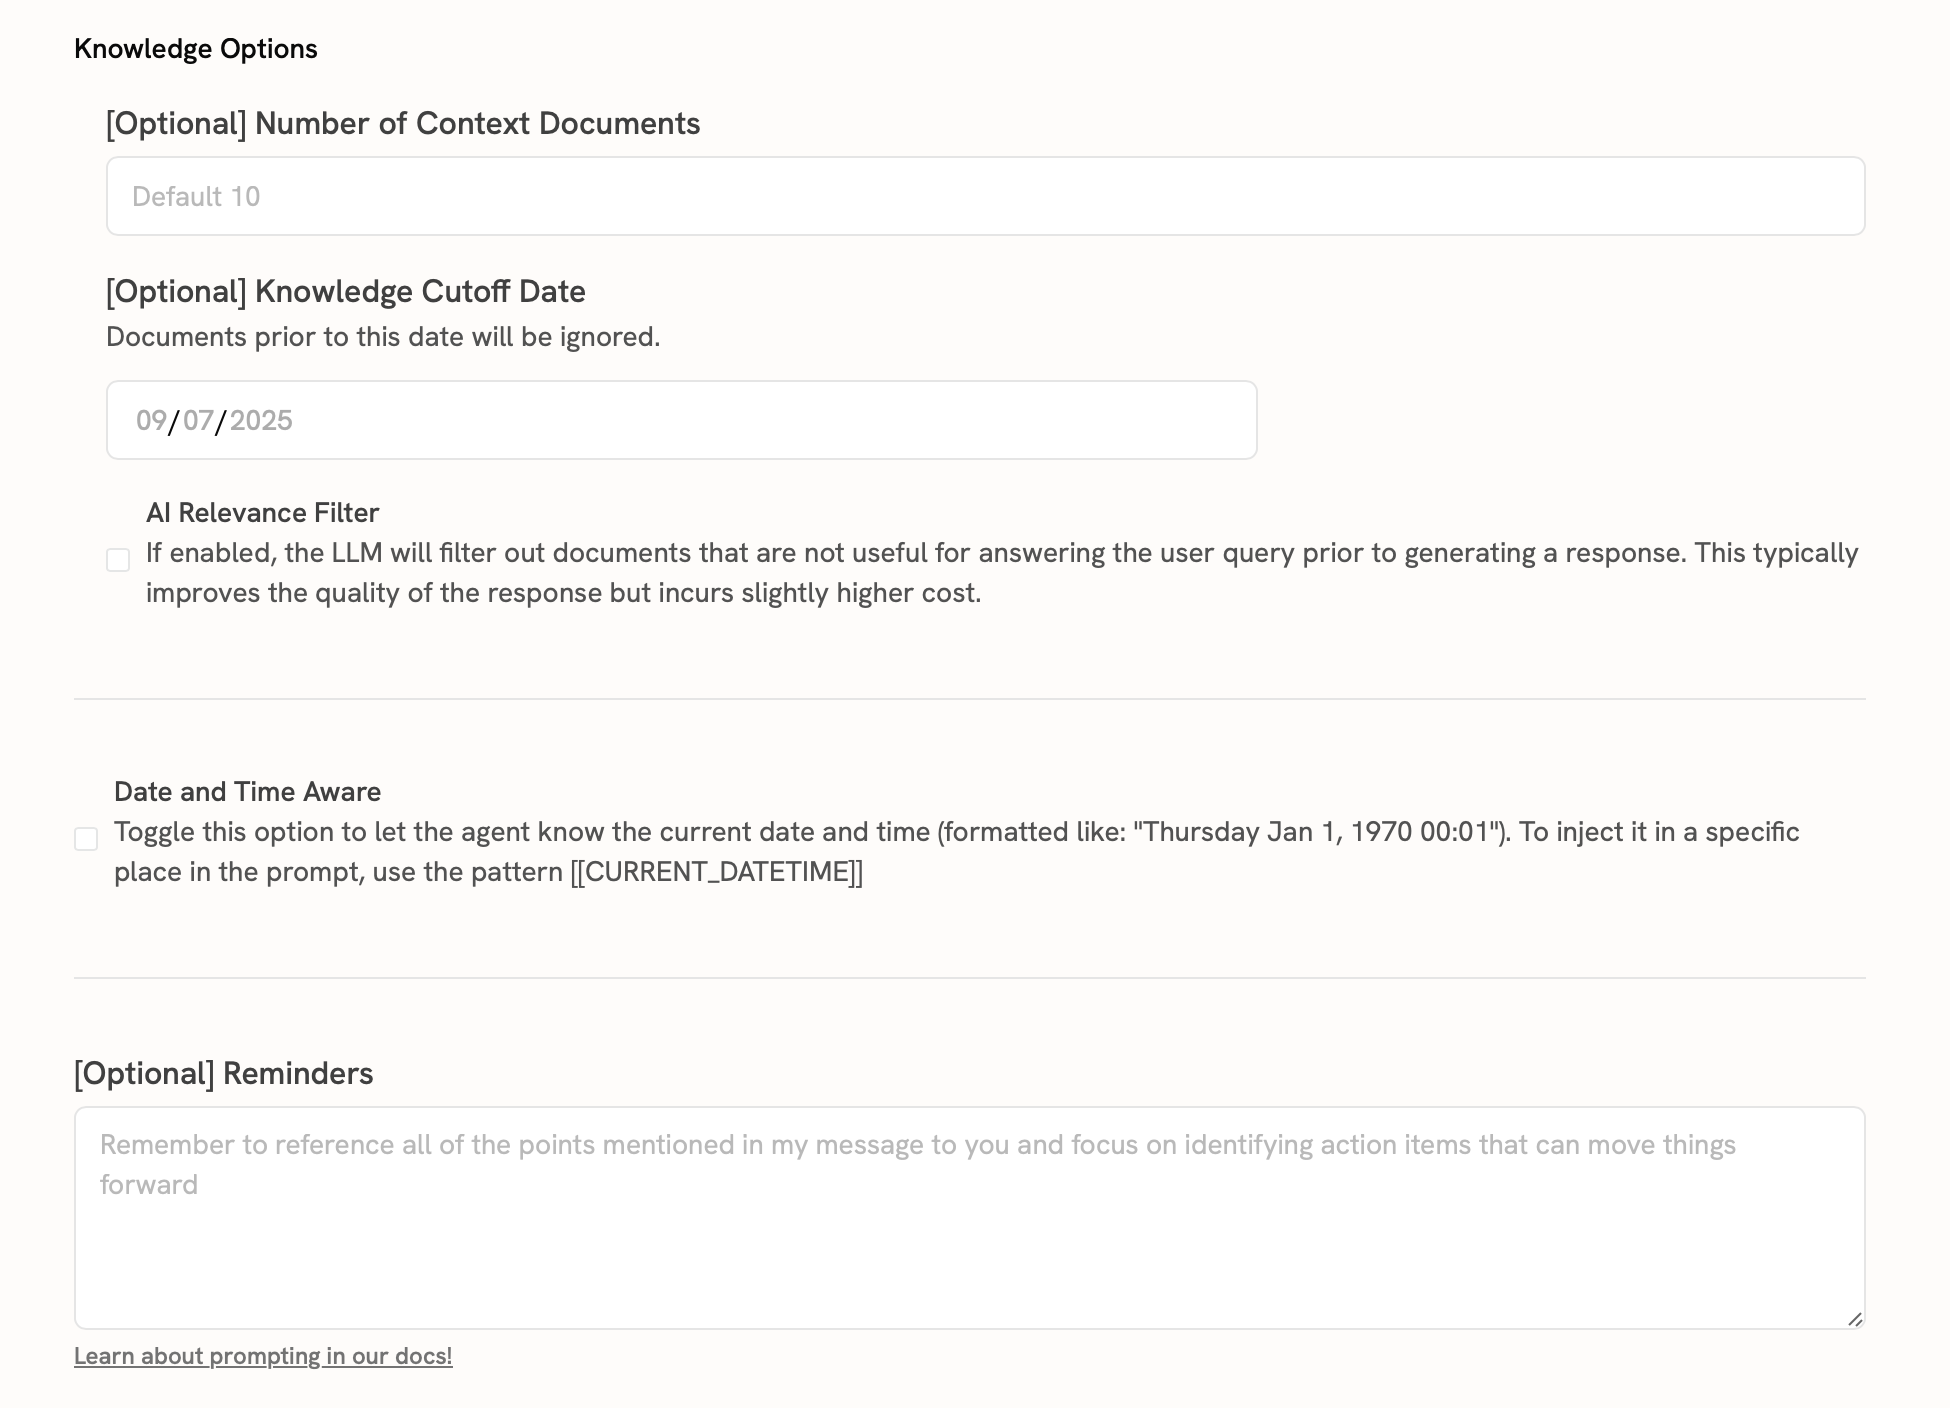
Fine-tune your Agent's behavior:
* **Knowledge Options**: Search depth and result limits
* **Model Selection**: Choose the AI model for your Agent
* **Date/Time Awareness**: Enable temporal context
For more information about User Groups and access management,
see [User Management](/admins/user_management/users_and_groups).
Fine-tune your Agent's behavior:
* **Knowledge Options**: Search depth and result limits
* **Model Selection**: Choose the AI model for your Agent
* **Date/Time Awareness**: Enable temporal context
 Once published, your Agent will be available to your users in the Chat interface.